Overview
So far in these tutorials we have dealt with the types and functions contained within the Linx plugin library. We are now going to explore the use of the FilePLG .
The file plugin contains pre-built functions and services related to file operations such as reading and writing data, directory monitoring and file management on a local or connected server drive.
Please note the terms ‘Process’ and ‘Custom Type’ have been depreciated and have been replaced with ‘Function’ and ‘Type’ respectively. More details here.
Feel free to contact support@linx.software and we'll assist.
What do you need?
- Windows 7 or higher
- Version 6 or 5 of Linx (https://linx.software/)
- MS SQL Server
Resources
Open the provided sample application in your Linx Designer to help along your learning journey:
Linx5 - Solution.lsoz (29.4 KB)
Linx6 - Linx6.zip (43.5 KB)
Adding the File plguin
First we need to add the file plugin to our application which can be done by clicking on the ![]() button in the plugins panel.
button in the plugins panel.
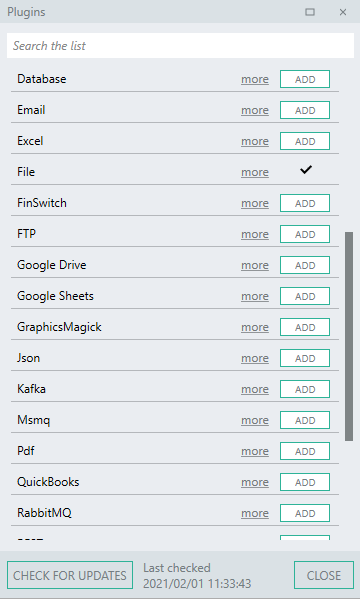
Then just ADD the File plugin:
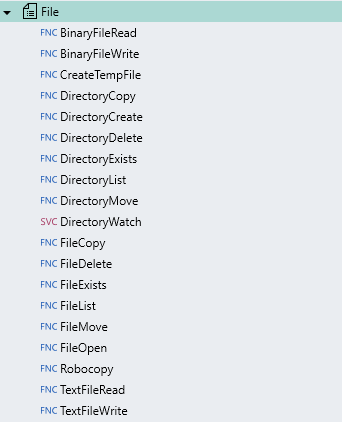
We now have access to file related functionality:
Writing to a file
In the below tutorial we will extend our application that we have been building so far to incorporate file integration with our ‘customer’ functionality. This tutorial will aim to demonstrate most of the functions within the file plugin.
In the previous tutorial, we ended with having a user-defined function ‘GenerateCustomerDetailsList’ that returns a list of enriched ‘customer’ types. Now, lets re-use this function and write out the results to a local text file.
First, lets create a new function with the name of ‘WriteCustomerListToFile’.
Next, add a call to the ‘GenerateCustomerDetailsList’ function.
We now have a list of ‘customer’ items returned, lets now write each item on a new line in a text file.
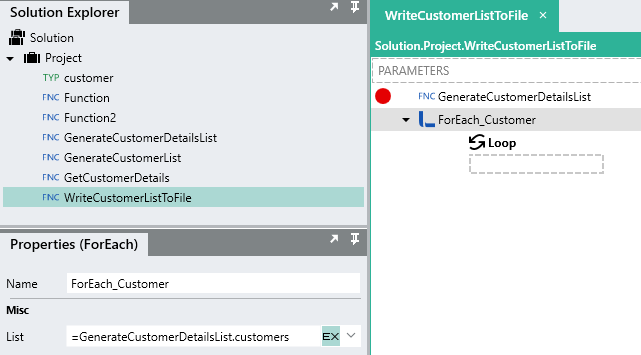
As stated in the previous tutorial, we’ll need to iterate through the returned ‘customer’ list , item-by-item. We can just add a ForEach function and loop through the list returned from the ‘GenerateCustomerDetailsList’ function.
Now we want to write each ‘customer’ out to a file.
To write data to a file, we can use the TextFileWriteFNC .
In our case, we are going to create a .csv (comma delimited) file and write out the different field of a ‘customer’ as separate fields in a text file. To demonstrate some of the writing functionality, add a TextFileWrite into the execution branch of the loop.

We now need to configure the function properties, first we need to set a file path which the contents will get written to:
C:\temp\linx_customers.csv
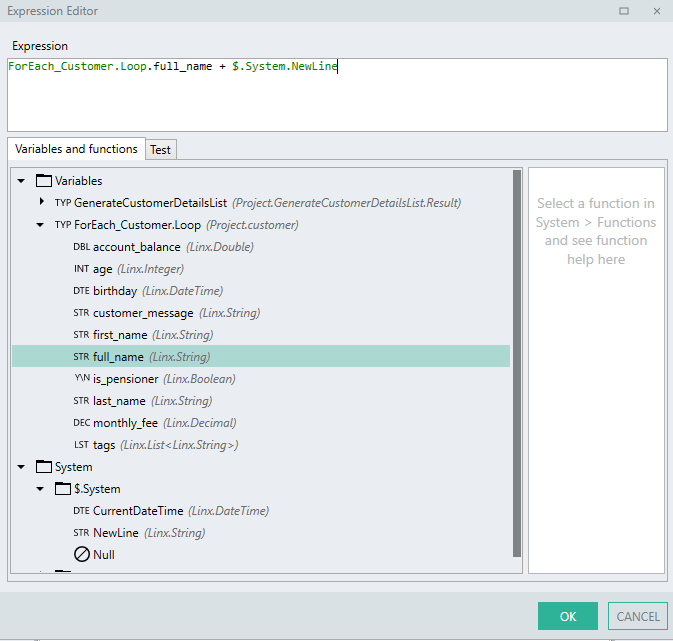
For the contents, for now we are just going to write out the name of each customer using an expression. Just like a string type, you need to explicitly state the formatting such as a new line.
=ForEach_Customer.Loop.full_name + $.System.NewLine
If the file does not exist, we’ve set it to create a new one. If the file does exist then we’ve set the function to append or add on to the current contents in the file.
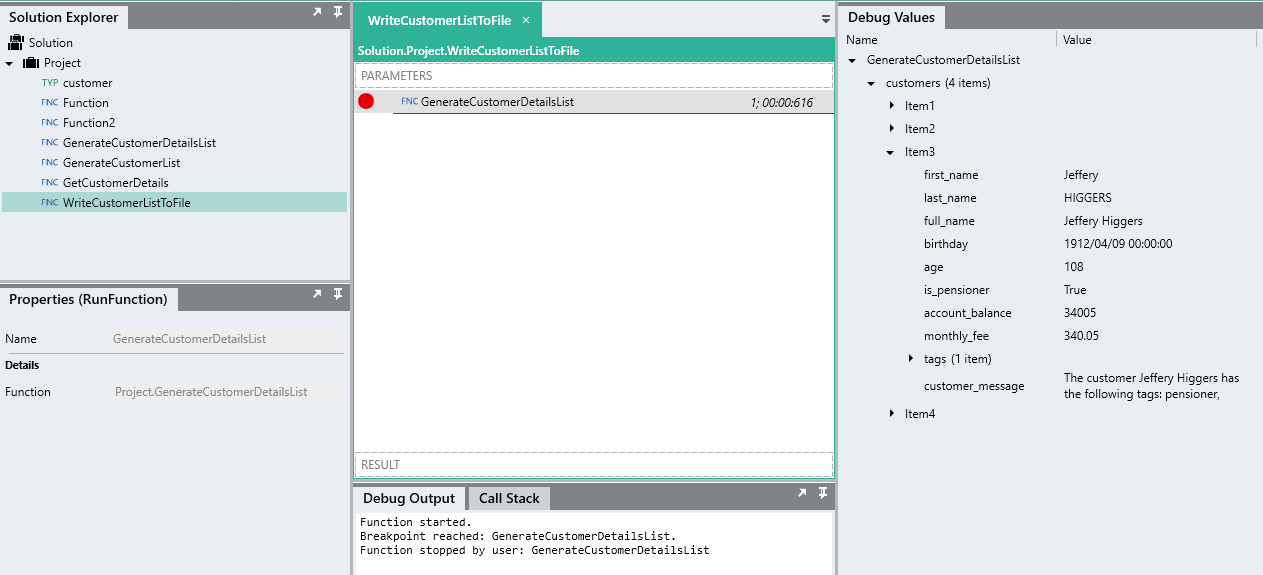
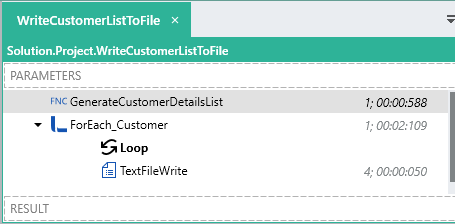
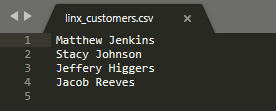
If you debug the ‘WriteCustomerListToFile’ function, you will see the list of customers being returned and then being written to a file, line-by-line:
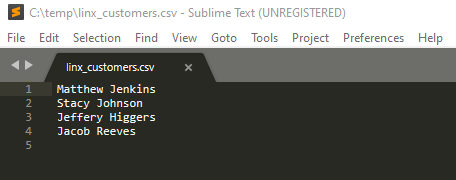
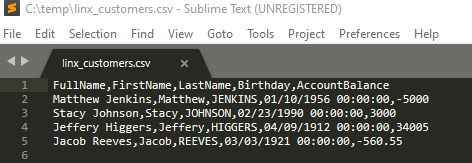
If you look in the directory c:\temp there should be a csv file with the name of “linx_customers.csv” which should contain the name of the customers in the list:
If I debug again, my file will have “double” the entries:
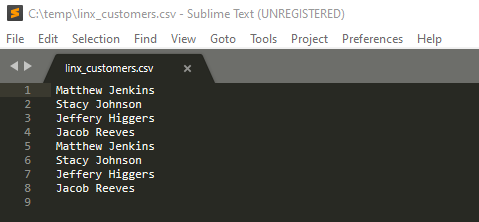
This is because we set the TextFileWrite’s to append data to the file if the file exists. Because we never reset or cleared the file, any subsquent content will be appended the current file.
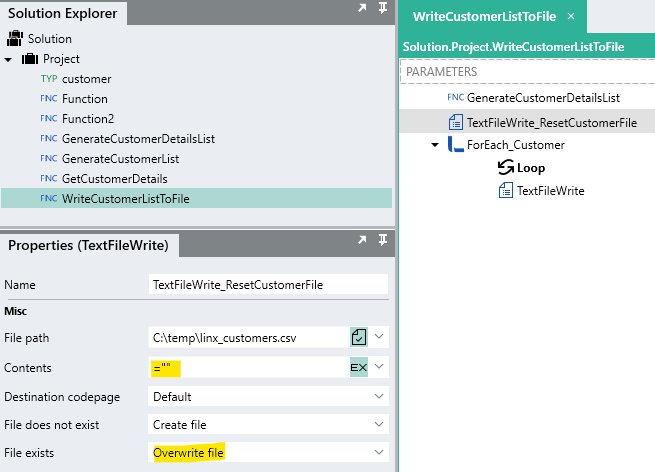
Now in our case, we want to “reset” the file every time the function ‘WriteCustomerListToFile’ executes.
This can be done using another TextFileWrite and the beginning of the function. This time, the file exists property is set to overwrite the file. When the function executes, if the file does exist already, it will be overwritten with blank contents.
Now, it may have not become apparent yet, but functions often share similar properties and you want to use the same value as the same input across your application. In our case, we use the file path “C:\temp\linx_customers.csv” to “reset” the file and to write the contents of the list to. Now, if we wanted to change this path to something else, we would then go and have to find all the references of this hardcoded path and change them, very bad practice.
To solve this issue, you are able to create a “constant” or “static” value that can be accessed throughout your application, in Linx we call these an applications $.Settings. A setting value can be referenced as a value throughout your application which allows you to store commonly used values and alter then in a single place for application wide effects. A setting value cannot change at runtime i.e. be updated or set.
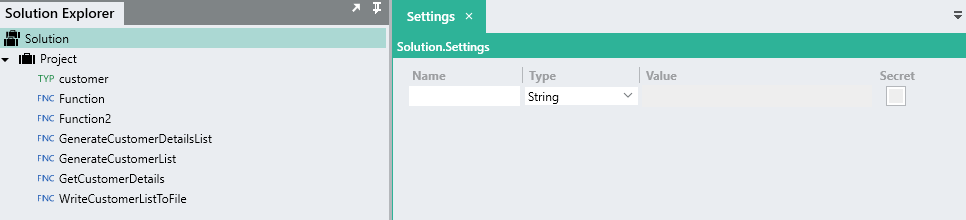
To create a new setting value, click on the ![]() button in the toolbar.
button in the toolbar.
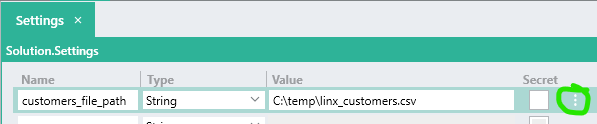
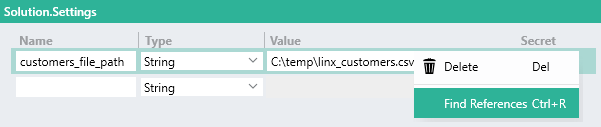
You are then able to add your Name-Value pairs:
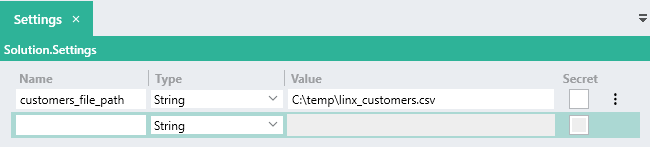
In our case, lets store the file path of our customers file.
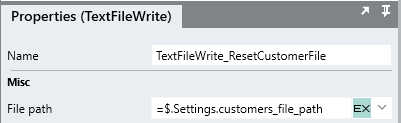
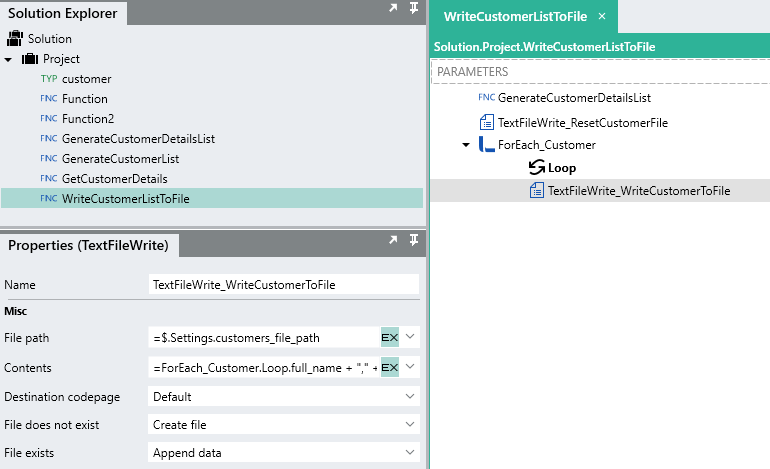
We then need to go update the file path property reference in both the TextFileWrite functions to reference $.Settings.customers_file_path:
Now when the ‘WriteCustomerListToFile’ function is executed, the customer file is reset first, and then the contents are re-added ensuring no duplicates:
Now typically when writing out data to file it will contain different fields or columns. In order to added column delimiters, you must explicitly add them using expressions. In our case, we are going to separate the fields we write out by the “,” character.
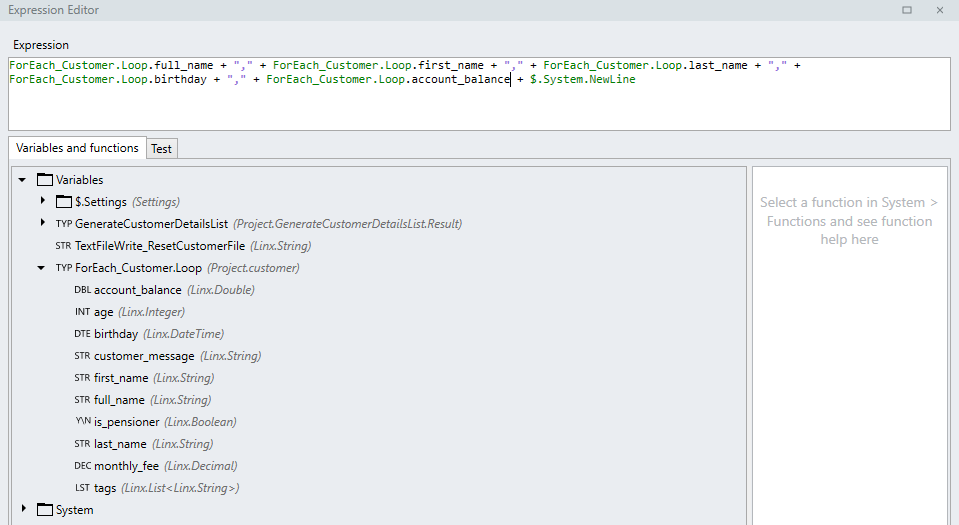
= ForEach_Customer.Loop.full_name + "," + ForEach_Customer.Loop.first_name + "," + ForEach_Customer.Loop.last_name + "," + ForEach_Customer.Loop.birthday + "," + ForEach_Customer.Loop.account_balance + $.System.NewLine
We are writing out the separate fields of our ‘customer’ item in the current loop as a single line in a text file separate by commas to indicate the fields.
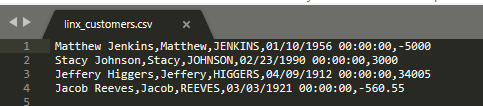
When the function executes, the file will now contain separate fields for each customer.
When parsing this data in Linx or another system, it is useful to put header names on the fields so the target system has an easier time picking up the columns. With Linx, we will need to create a string type which will hold all the column names separated by commas and add them to the beginning of the file when it is reset.
Lets go back to using some lists just for demonstration sake. Instead of “hardcoding” our header line like:
"FullName,FirstName,LastName,Birthday,AccountBalance"
We can create a list to hold the header values, this way we can updated or remove column headers without editing a big line of text.
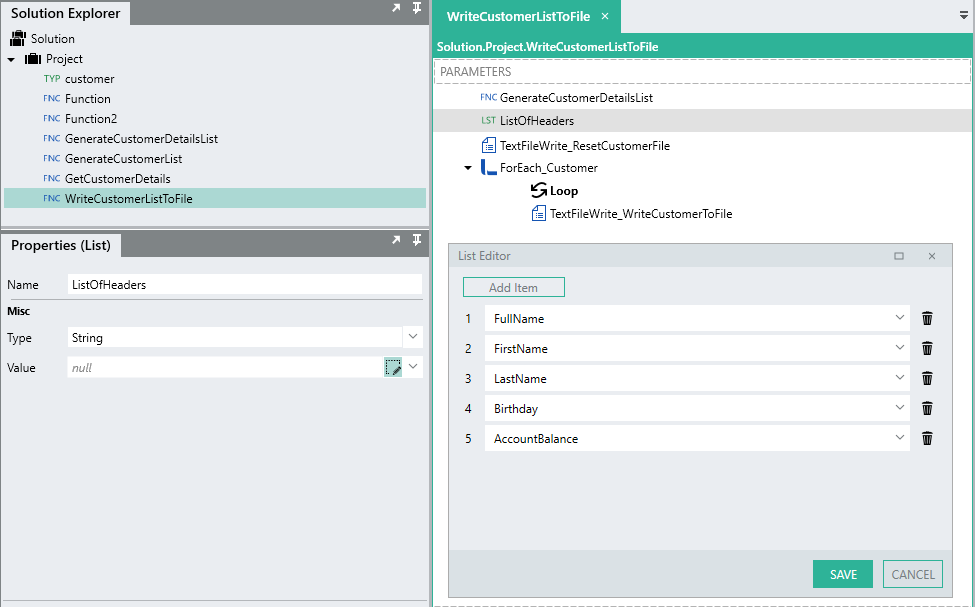
Add a new list type to the ‘WriteCustomerListToFile’ function and give it the name of ‘ListOfHeaders’. Add the relevant header names that map to the fields that are being written to the file:
Now we are going to loop through this header list and build up a string containing our header line. First however, we need a string type to store the header value, so add a new string type below the ‘ListOfHeaders’ with the name of ‘HeaderLine’.
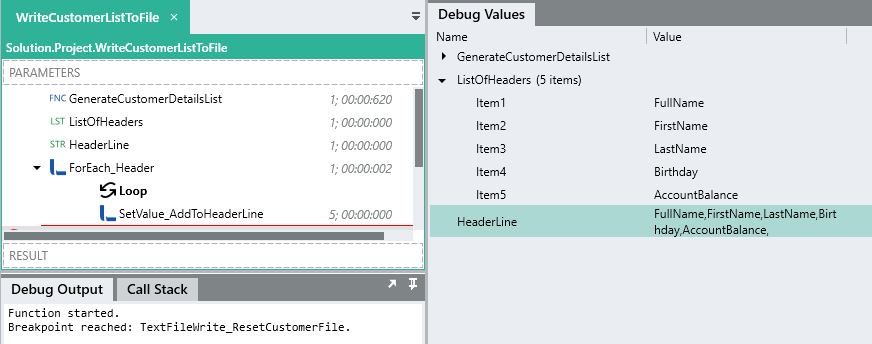
Now lets loop through the ‘ListOfHeaders’ and add each item to the ‘HeaderLine’ type, seperated by a “,”.

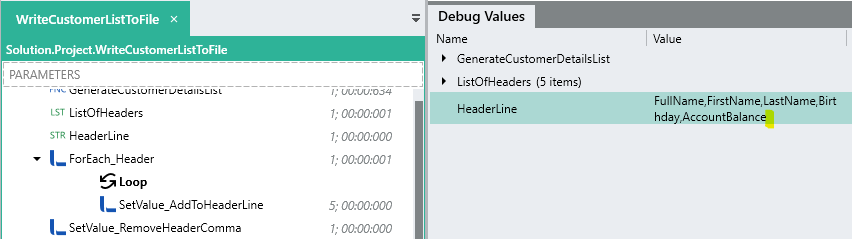
We now have a string containing the whole header line to write to the file:
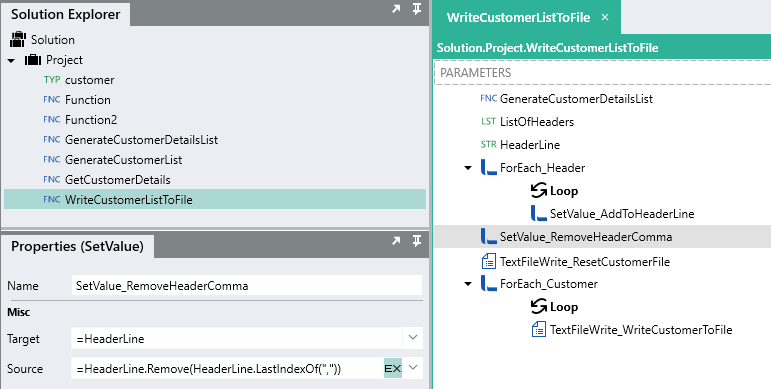
However, you will notice theres a remaining “,” added to end because of our expression, to get rid of it, we can just remove the last character using a SetValue and the below expression:
HeaderLine.Remove(HeaderLine.LastIndexOf(","))
Now that we have a properly formatted header line, lets add it to the first line of the file when it is created. We already reset the file using the ‘TextFileWrite_ResetCustomerFile’, we can just alter this to write the value of ‘HeaderLine’ as the contents instead of " " , this will reset the file with a header row.
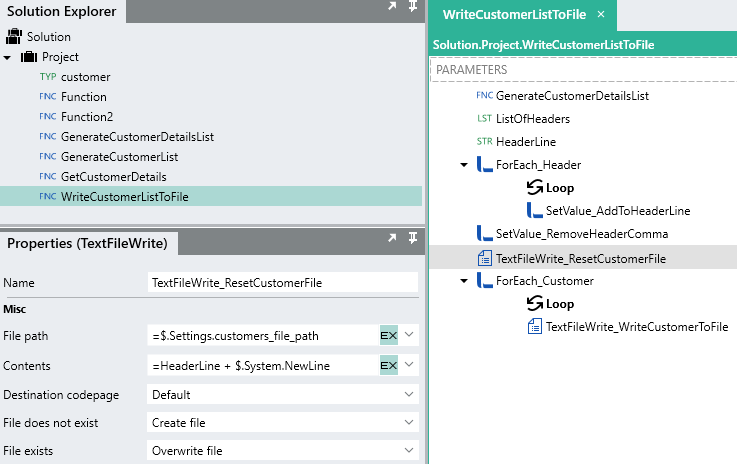
When you debug the function, the file will now contain the header row:
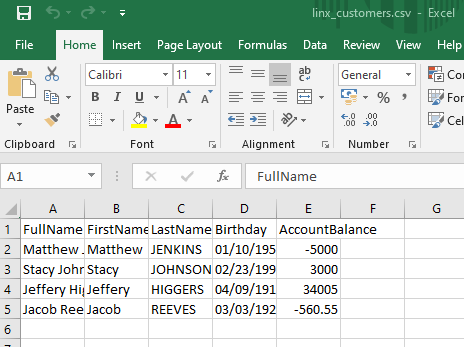
Because its a csv, you can open it in Excel as well:
Importing the customers file back into Linx
Now that we’ve interacted with some file based functionality and written out a ‘customer’ file, let now import this file back into Linx and read the data from it.
When reading data from a text file, you need to use the TextFileReadFNC . This allows you to parse files as whole data sets or line by line.
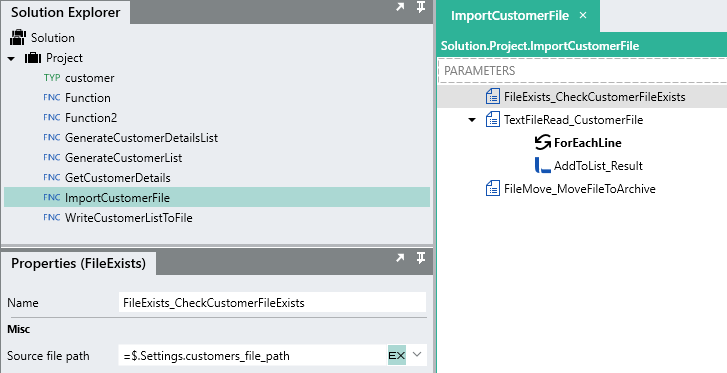
Lets create a new function called ‘ImportCustomerFile’.
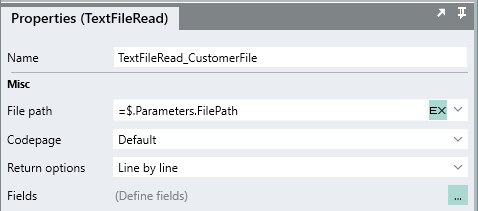
Add a TextFileRead function to the canvas and configure it to read the file located in the file path stored as the setting value that we used to write the file:
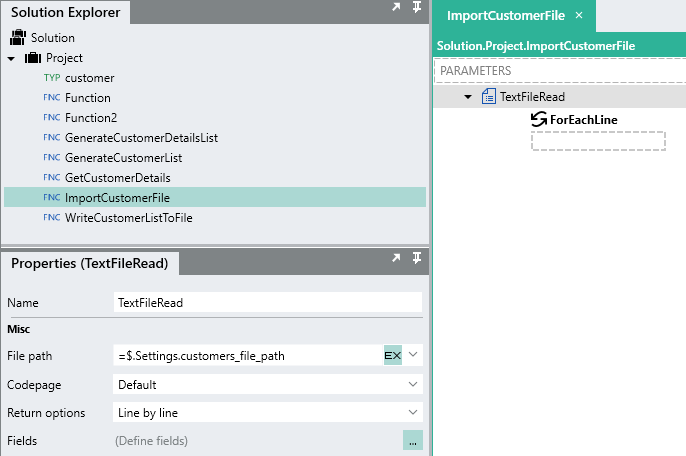
Now for the return options, we are going to leave it as line by line so each line will be returned as an item in a loop, very much like a ForEach function.
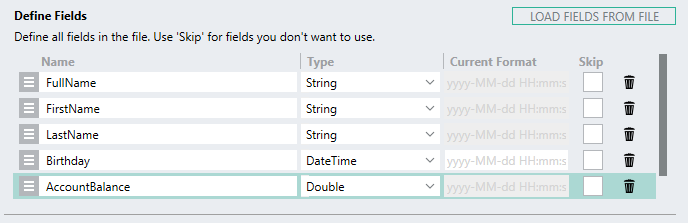
Next, we need to define the fields of our file so we can work with the seperate fields. This is done by opening the field editor: ![]()
In the top section of the import editor we can indicate that our file is comma delimited and that the header row is on line 1.

Next, we can load the header values by importing a sample file, this is done by clicking on ![]() and selecting the file that was generated earlier. This will import the header name values automatically as we indicated the header was on row 1. We can then change the data types to match accordingly
and selecting the file that was generated earlier. This will import the header name values automatically as we indicated the header was on row 1. We can then change the data types to match accordingly
We can
To test it out, you can ![]() using the same file:
using the same file:
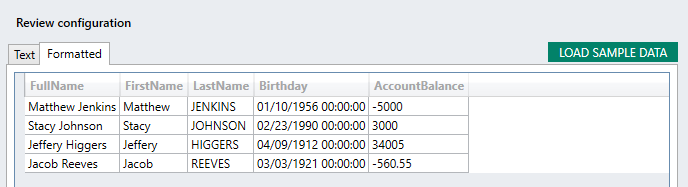
Save the configuration.
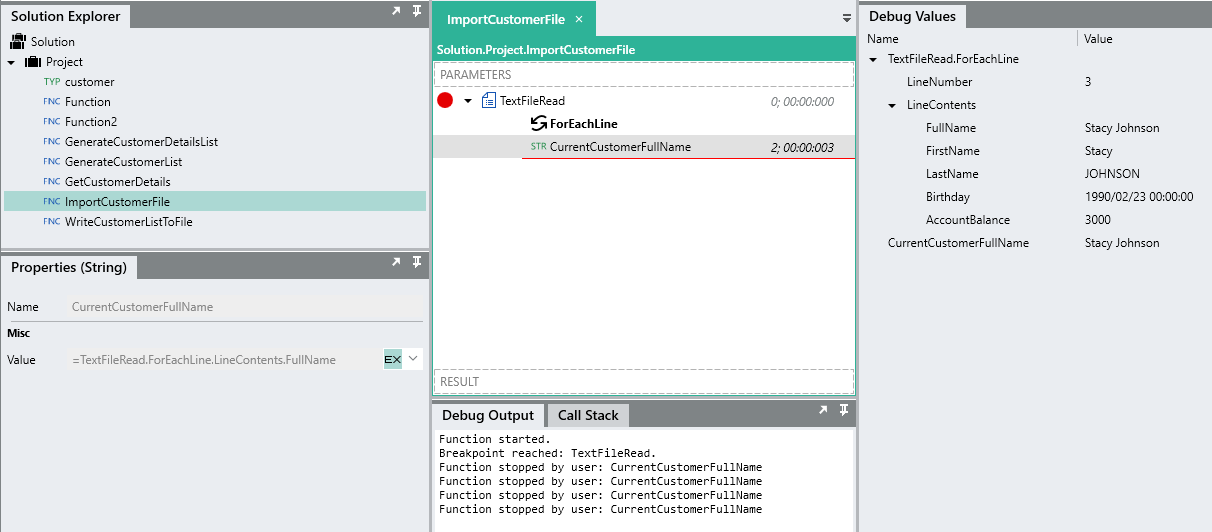
Now for each line read, an execution branch loop will occur and any functions in this path will have access to the current line values by referencing TextFileRead.ForEachLine.LineContents.
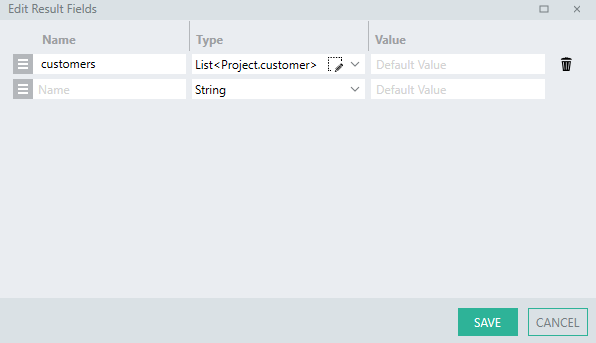
Lets now return the contents of the file as a list of ‘customer’ items as the results of the ‘ImportCustomerFile’.
We just need to add a result and its type as List<Project.customer>:
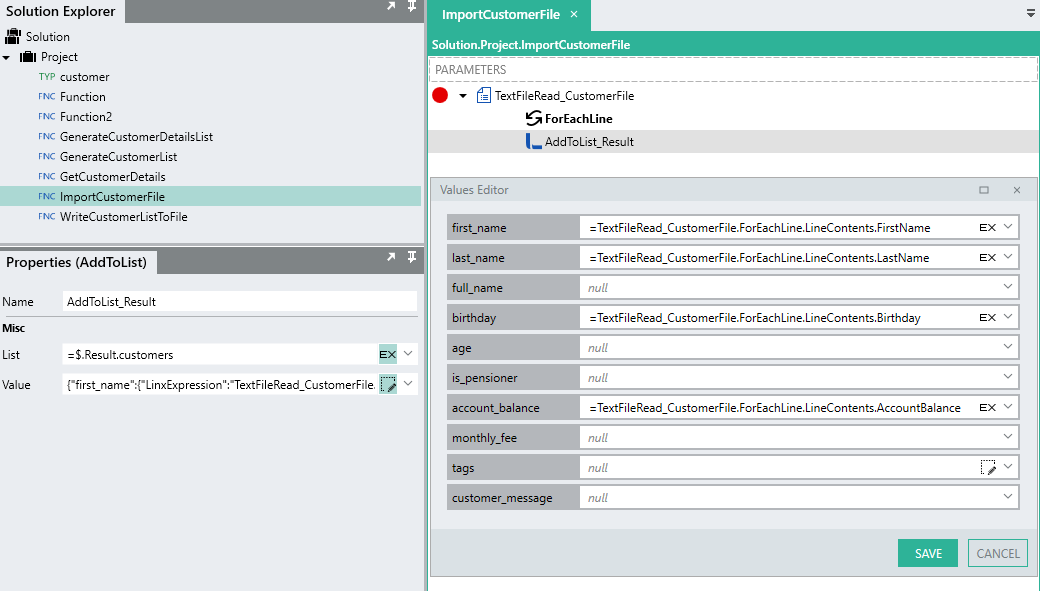
Then, like before, use an AddToList to add the values of the current line as ‘customer’ item fields:
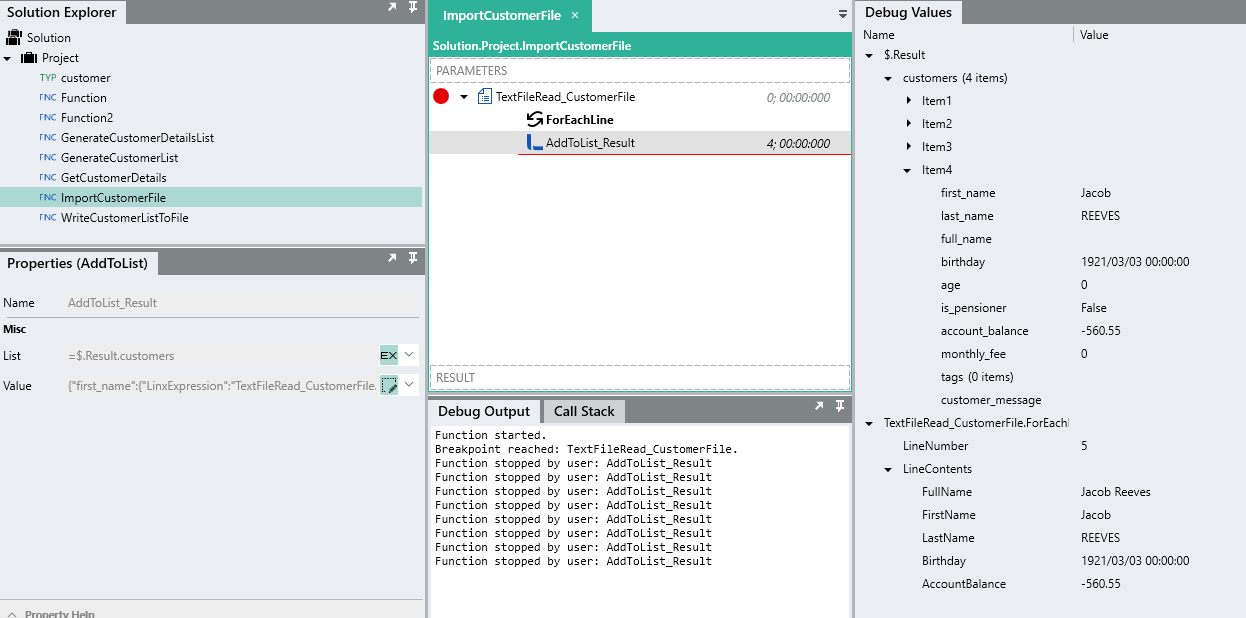
Now when the function runs, the file contents are read and returned as a result of the function:
Because Linx is “stateless” i.e. does not persist data, you need to store data on data source of some kind such as a file or database if you want to retrieve the data at a later stage.
Now that we’ve read the contents of the file, we should probably move it to some sort of “archive” folder.
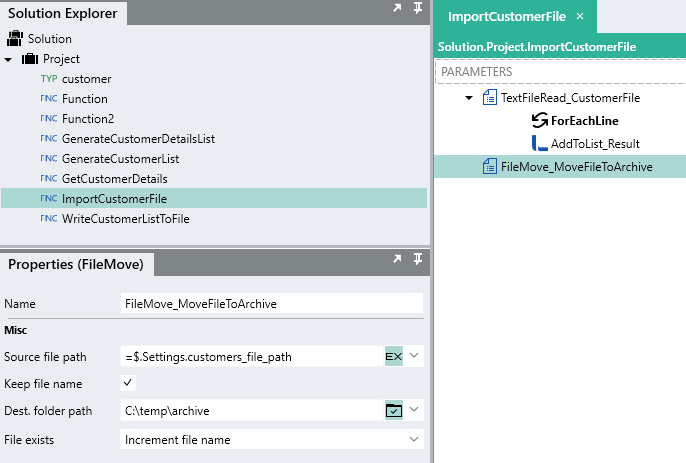
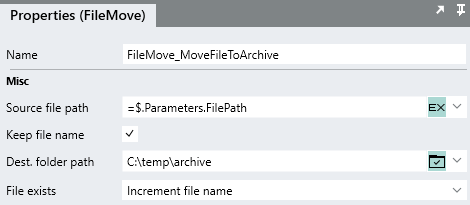
You are able to move and copy files in Linx just like you would in Windows. In our case, we are going to the FileMoveFNC to move the file to a “archive” folder.
The source file will be the value stored in the setting value we’ve been using.
For the destination folder, we need to create a directory path and not a file path pointing to an “archive” directory.
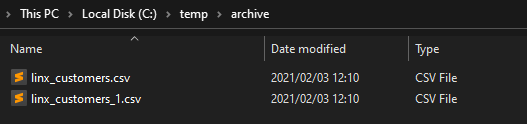
If a file already exists in the archive folder, then the current file name will be incremented so that it is unique.
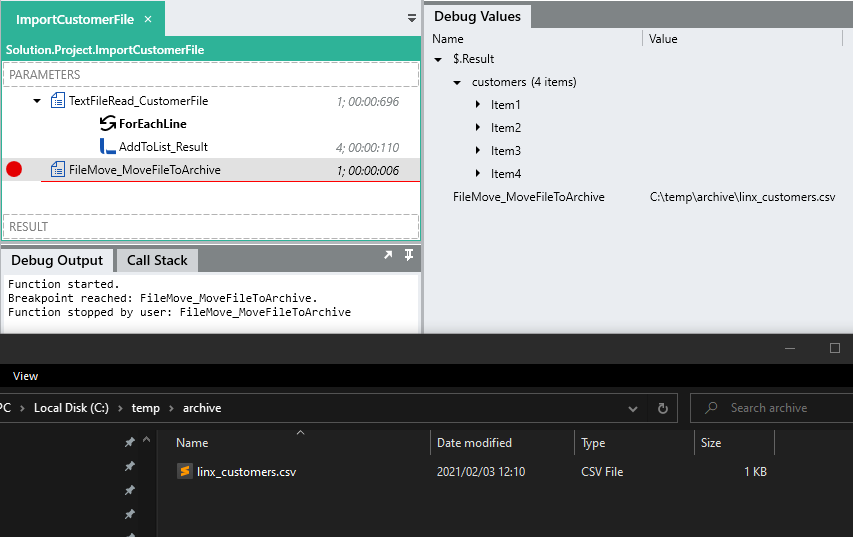
When you debug the ‘ImportCustomerFile’ function, the file should now be moved once the function has completed.
Make sure you close any editor with the file open as it will cause an error when debugging.
Now run the ‘ImportCustomerFile’ function again, this time you will recieve an error indicating that the file that is being read does not exist, this is because we moved it in the previous run.
Function started.
Exception at TextFileRead_CustomerFile:
ImportCustomerFile.TextFileRead_CustomerFile: File [C:\temp\linx_customers.csv] does not exist.
To add some error handling to the function, we can check if the file does indeed exist before executing any processing logic, if it does not, then the function logic will be skipped.
Using a FileExistsFNC we can check if the file exists without throwing an error. This will return a boolean value which we can use in decision making:
Now we need to create a branch of logic that will only execute if the file already exists.
This can be done with by adding an IfElse to the function:
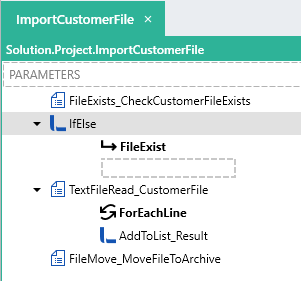

Because the FileExists function returns a boolean type, we can reference this straight in the condition as conditions evaluate to a boolean type, no further expressions are needed.
Now, if a file exists, we want to execute all our function logic, so we can just drag the functions into our execution path:
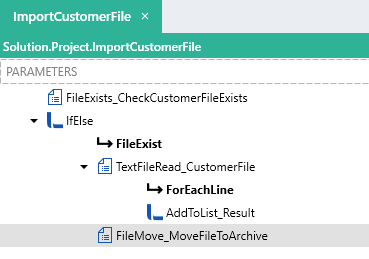
Now when you debug, an error will not be thrown and the function logic will be skipped.

What if we have multiple “customer” files within the folder and want to import all of them? To do this we can extend out current function to take in an input parameter which will be a file path. When the ‘ImportCustomerFile’ is called from another function then a file path will be passed in. This file will be read and the ‘customer’ items in the particular file will be returned.
Lets add a new input parameter called “FilePath”.
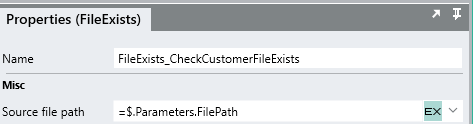
Then, inside the ‘ImportCustomerFile’ function, replace the references to $.Settings.customers_file_path with a reference to the input parameter $.Parameters.FilePath.
An easy way to find references of a setting is to right click the setting and select find references.
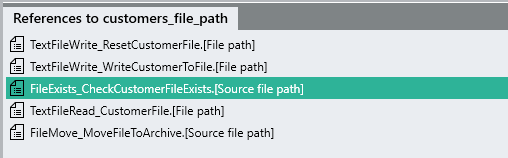
Locate the propery references within the ‘ImportCustomerFile’ function and alter them to point to the input parameter instead of the setting value.
Now, copy the “linx_customers.csv” file from the archive folder and paste in in the C:\temp location like earlier.
Debug the ‘ImportCustomerFile’ function again, this time passing in the file path as an input parameter.

The file will be processed and move to the archive folder, because there is a file that has the same name, the file name is incremented:
Processing multiple files
So now our file import function is re-usable, what if we could scan a directory, filter for certain types of files, and then run logic per file picked up? This is where the FileListFNC comes in.
Lets create a new function which will scan a directory for “customer” files, then for each file picked up, call the ‘ImportCustomerFile’ function passing in the file path. When the ‘customer’ items are returned we can build up a “master” list.
To begin, add a FileList function to the new user function.
The folder path is the directory which will be “scanned”.
If you select include subfolders then children folders will be searched through, in our case we don’t want that.
If you select the loop results option, the file details will be returned one by one in an execution branch, otherwise a list of file items will be returned which you need to loop through.
If the return full path option is checked, the full path of the file will be returned, otherwise just the file’s name.
The search pattern field is for matching files which match that pattern, in our case, any files that contain the text “customers” in their file name.

The file list will return a number of file related details per file:
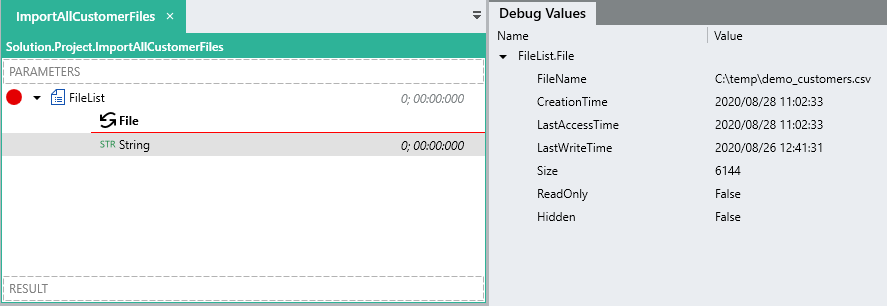
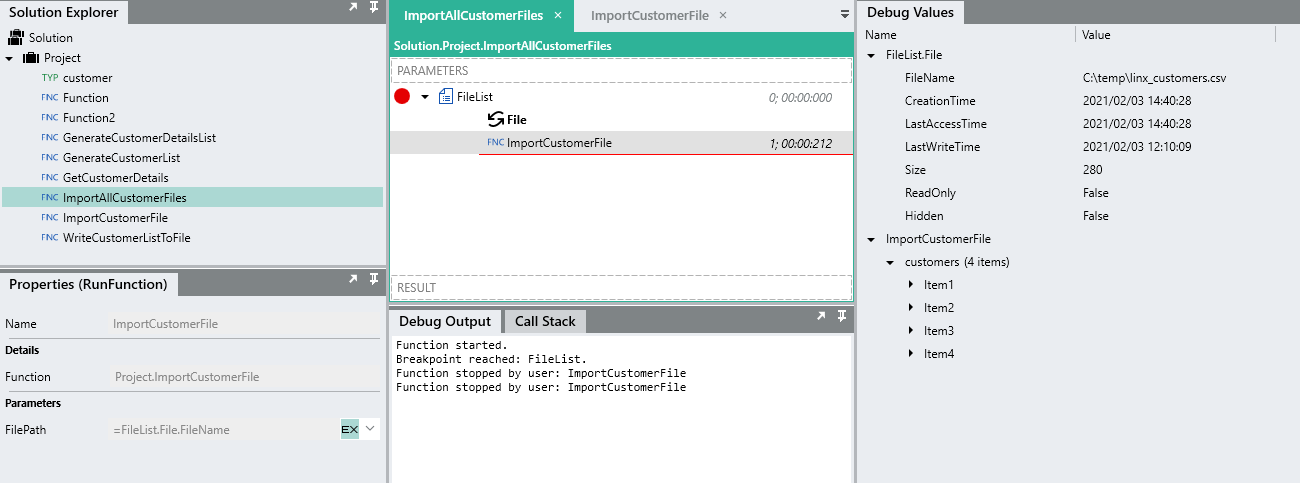
In our case we can use the file name and pass it into the ‘ImportCustomerFile’ function by referencing FileList.File.FileName as the input parameter.
The function will return a list of customers from that particular file:
Because we want to store all the ‘customer’ items from all possible files, we need to creare a global list of ‘customer’ items.
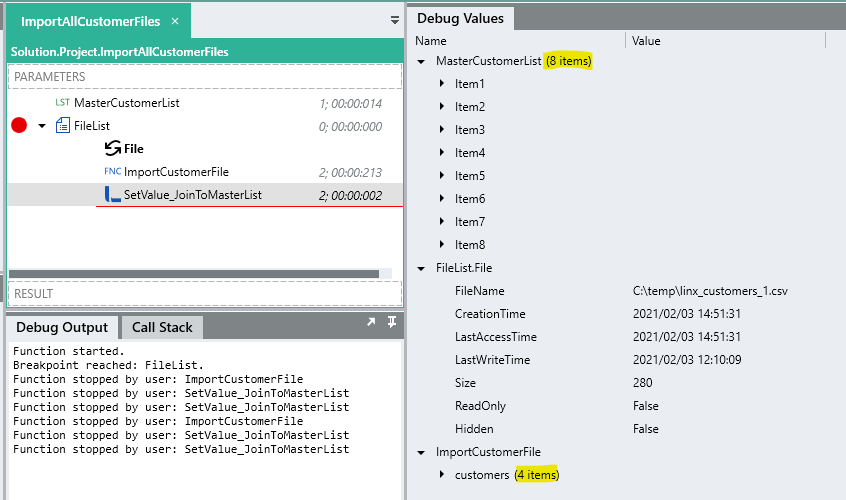
Because the ImportCustomerFile function returns a whole list of ‘customer’ items we cant use an AddToList function to add the returned list to the master list. Instead we must use a SetValue function and the .Concat() method.

Because both lists are of of the same type, we can join them using the .Concat() method. This will add the ‘customer’ items for each particular file to the master list of ‘customer’ items.
= MasterCustomerList.Concat(ImportCustomerFile.customers).ToList()
If you place multiple versions of the customers file in the "C:\temp" directory, then the function will pick them up and add the contents of each file to the master list.
You would then typically store these items in some type of data source such as a database or cloud service.
Next Steps!
Well done ![]() , you should now have a better understanding of interacting with files in Linx. In the next tutorial we will cover the DatabasePLG and how to read and write data from a database.
, you should now have a better understanding of interacting with files in Linx. In the next tutorial we will cover the DatabasePLG and how to read and write data from a database.