Overview
A critical component of any integration or application is its data persistence layer. As mentioned before, Linx does not persist data i.e. store it internally, therefore when you would like to store states or records for further retrieval you will first need to store them in a data source such as a file, cloud service or database. Typically, databases are used to store large amounts of records and perform analysis on these datasets.
In Linx, the DatabasePLG contains pre-built functions which allow you perform database related tasks such as creating transactions or executing SQL statements.
In this tutorial, we are just going to touch upon the use of the ExecuteSQLFNC which allows you to insert, update and retrieve records from a database. You are able to create your own SQL statement, adding in expressions and variable references when needed.
Resources
Open the provided sample application in your Linx Designer to help along your learning journey: Solution.lsoz (37.7 KB)
Connecting to a database
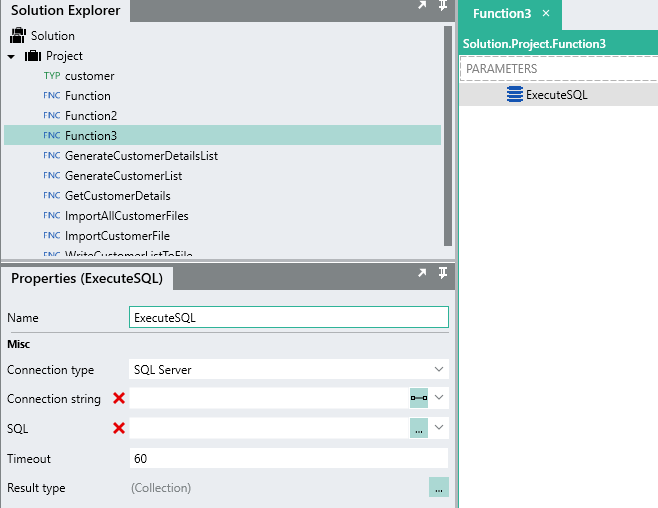
Connecting to a database in Linx involves the creation of a connection string with the relevant connection details. In order to create a connection string, you can make use of the connection editor. To open up the connection editor, add any function from the database plugin onto your canvas, in our case I’ll use the ExecuteSQL function.
In the properties section, open up the connection string editor ![]()
In my case I’m going to connect to my SQL Server database hosted in the cloud.
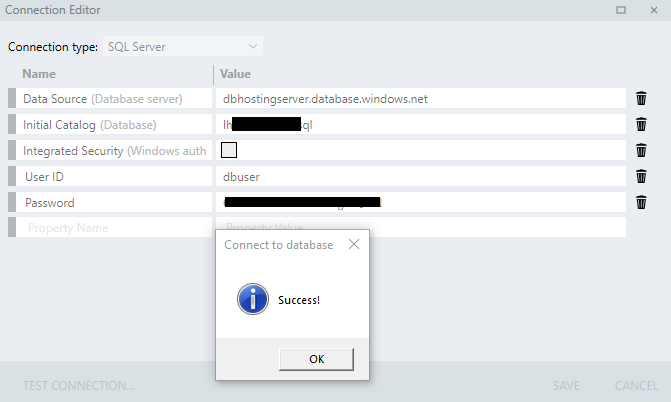
The data source will be your database server’s name.
The initial catalog is the instance name of the database.
Integrated security indicates its local.
The user id is the username.
Complete the connection details, test the connection and save.
 .
.
This will automatically format the connection details into a connection string like below:
Data Source=dbhostingserver.database.windows.net;Initial Catalog=lh36473399sql;Integrated Security=;User ID=dbuser;Password=HSJJ89s9uKSJ008iKLSqc;
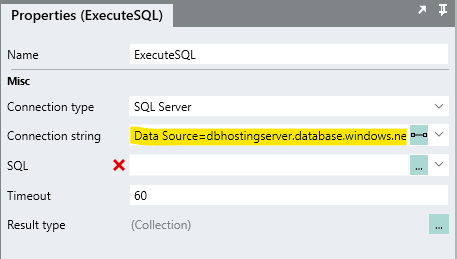
Because all of the database functions will be interacting with the same database instance, we will need to use this connection string again. So like we did before with the file path in the previous tutorial, we are going to create a “constant” or setting value to store this connection string.
To do this, first select the whole connection string and copy it out from the properties section.
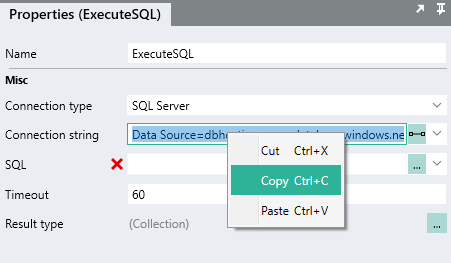
Then, open your applications $.Settings and add a new setting value:
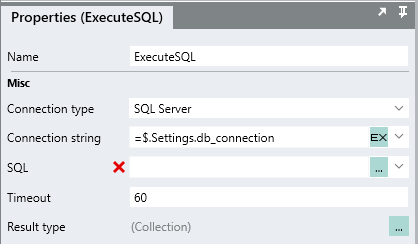
We now have a connection string value which can be referenced throughout our application.
Inserting records into the database
Now that we’ve established a connection to our database, lets perform some queries.
Using the SQL editor, you are able to write your own queries specific to your needs. These can be all off the CRUD operations. You also have the option of getting Linx to auto-generate your base query statements.
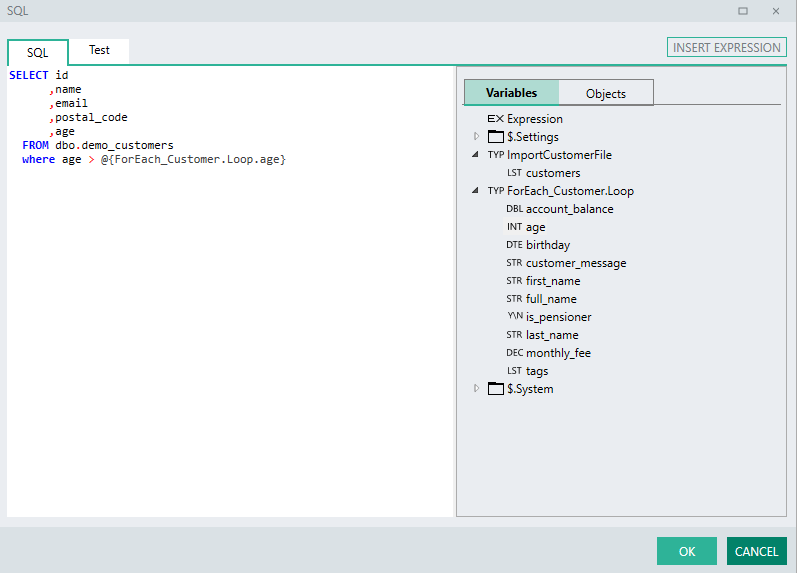
In the SQL editor you can access all the variables within scope and use them in your query:
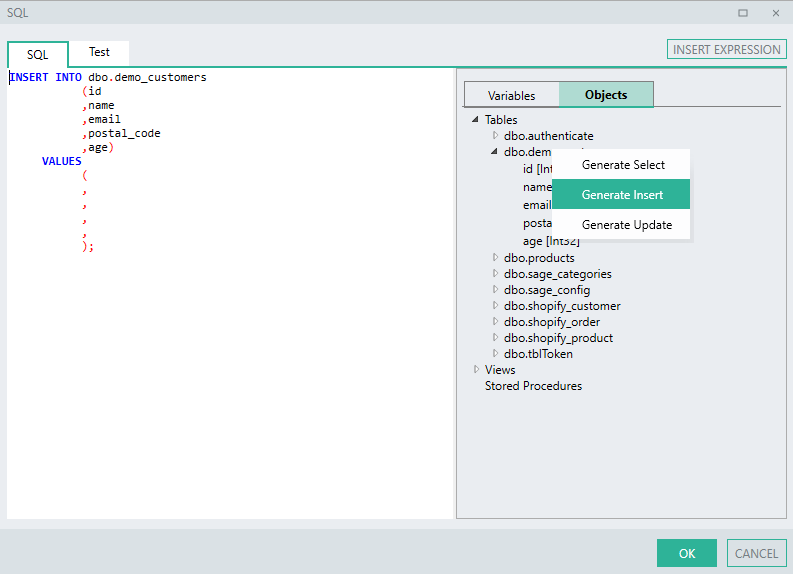
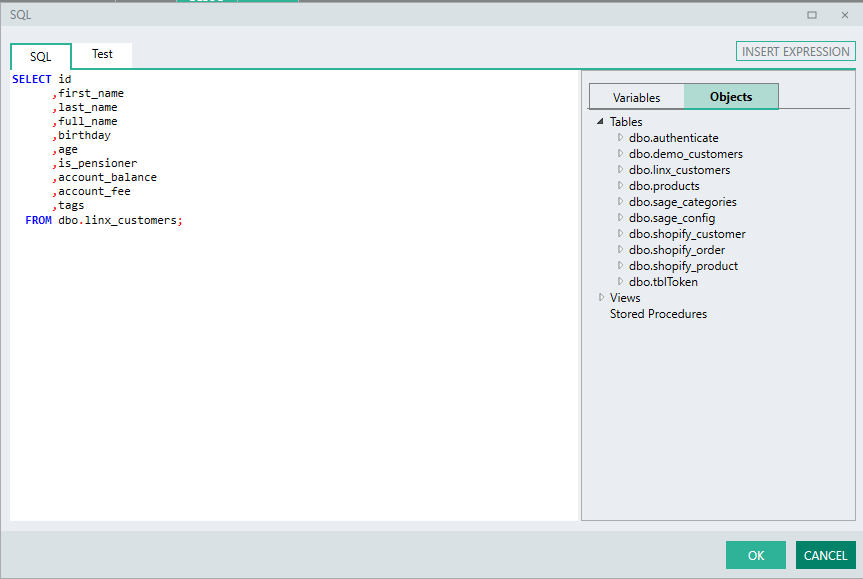
There is also an object explorer tab which give you a definition of your database tables and fields as well as an statement auto-generator option:
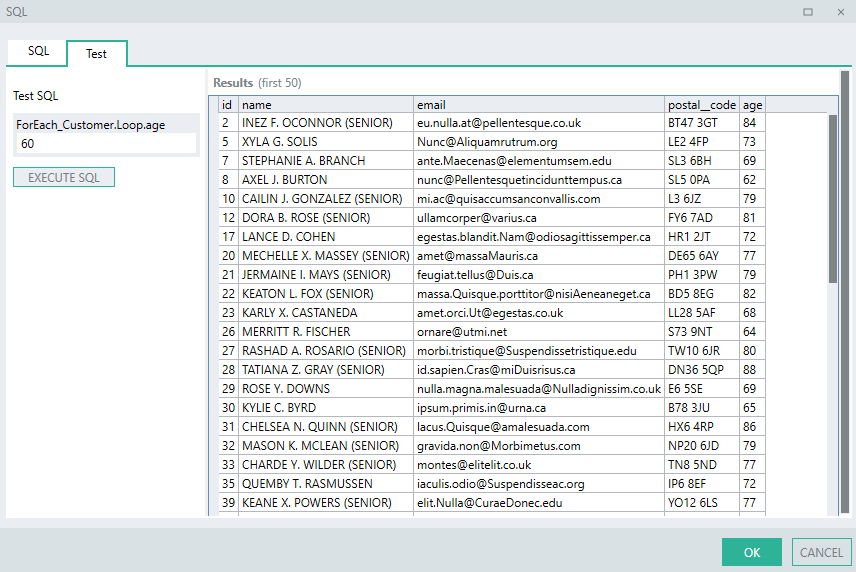
You can also test out your query using the test tab which will execute the query statement against the db.
Using the SQL editor you are able to perform all sorts of queries so lets get you familiar with some basics. Lets create a new function that will write the results of our file import into a database table containing ‘customer’ records.
First, we need a ‘customer’ table which will store the fields of our custom, similar to out custom type:
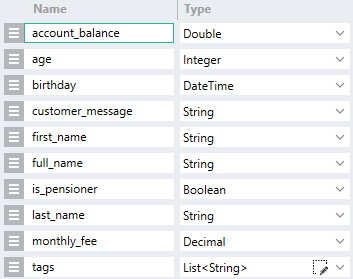
You can use the below statement to create the ‘customer’ table on your database instance by pasting the below code in the ExecuteSQL function and make a test execution.
CREATE_linx_customers_TABLE.zip (351 Bytes)
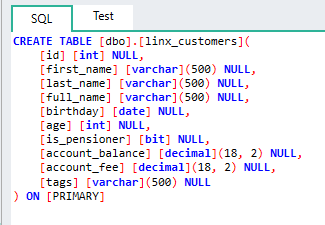
We now have an empty ‘customer’ table:
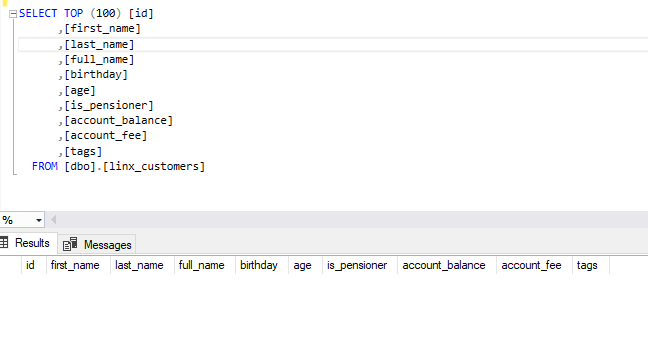
Now lets add the details retrieved from our customer file into the database.
Create a new function and give it the name of ‘ImportCustomersIntoDatabase’.
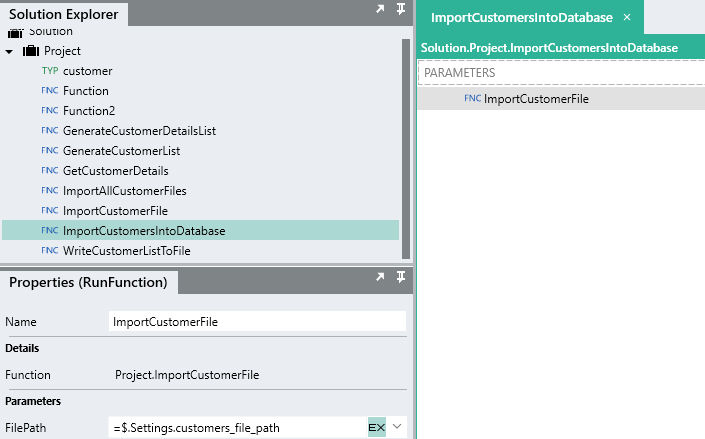
Next, we need to make a call to the ‘ImportCustomerFile’ function to return the contents of the customer file as a list.
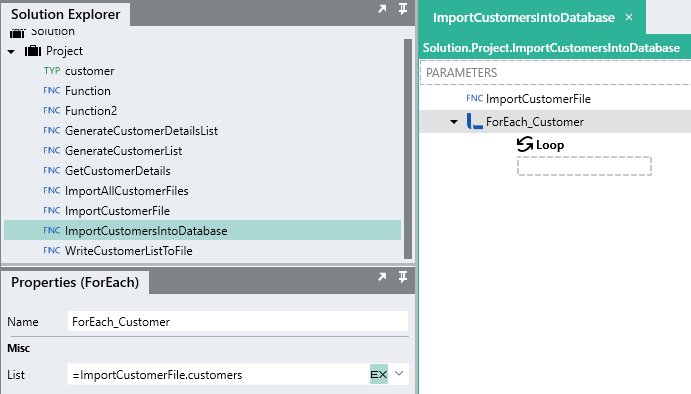
Next, we need to loop through each ‘customer’ item using a ForEach.
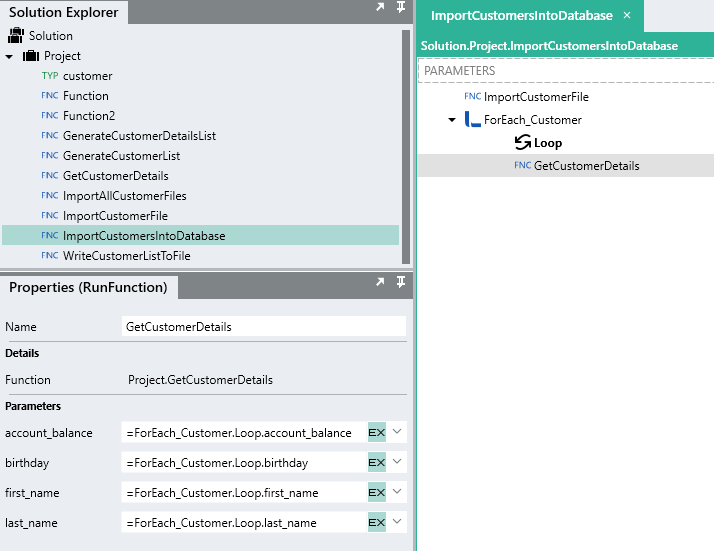
For each customer item we are going to insert the details as a record in the customer table in the database. However, the file contains limited details, so lets enrich the data first by making a call to our ‘GetCustomerDetails’ function from the first tutorial, referencing the fields from the current loop as the input parameters.
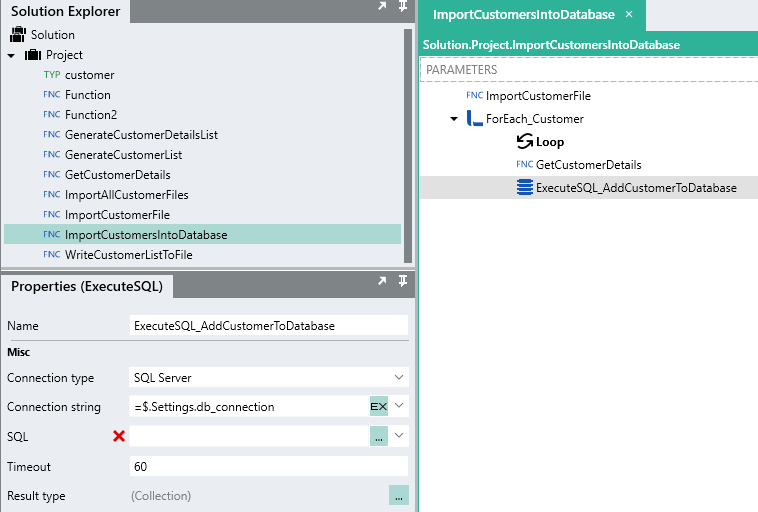
We can now add the values returned from the ‘GetCustomerDetails’ function as a record in the database. We can do this by using an ExecuteSQL function again and configuring the connection string to reference our setting from earlier.
Next we can write out our query statement using the SQL editor.
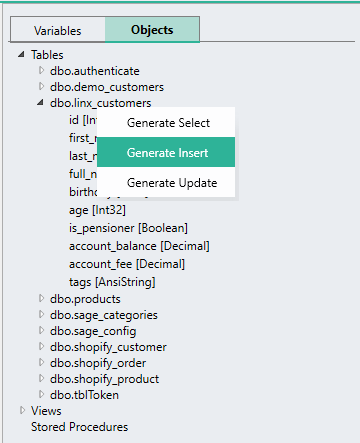
To help us out, we can open the objects tab, right click on the ‘linx_customers’ table and select generate insert.
This will create a “skeleton” query.
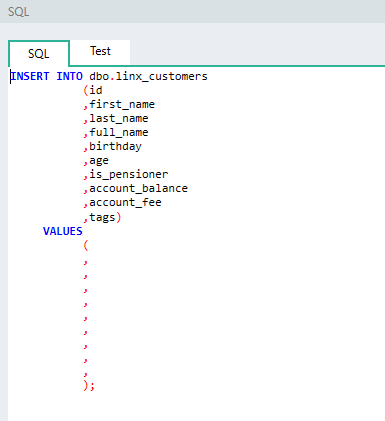
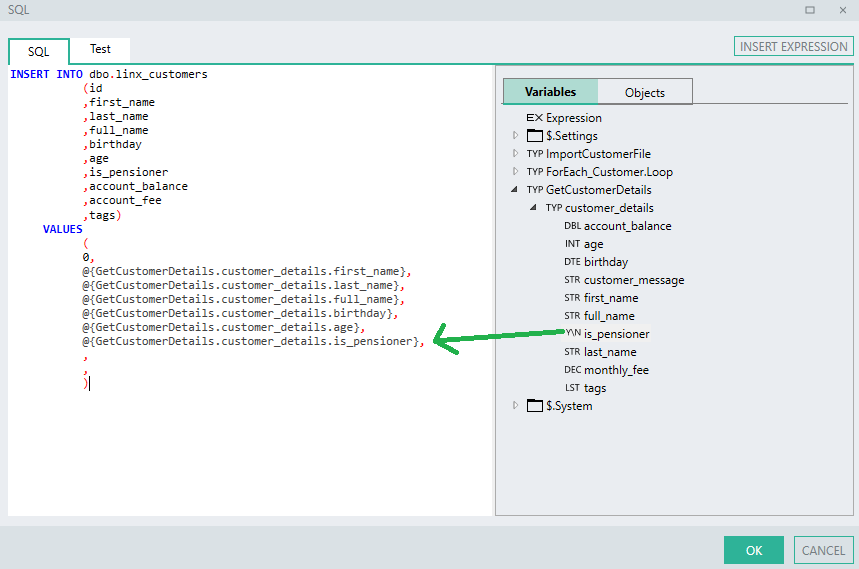
We must now add in our data references as the values to be inserted.
We can do this by dragging the appropriate variable from the variables tab into the query.
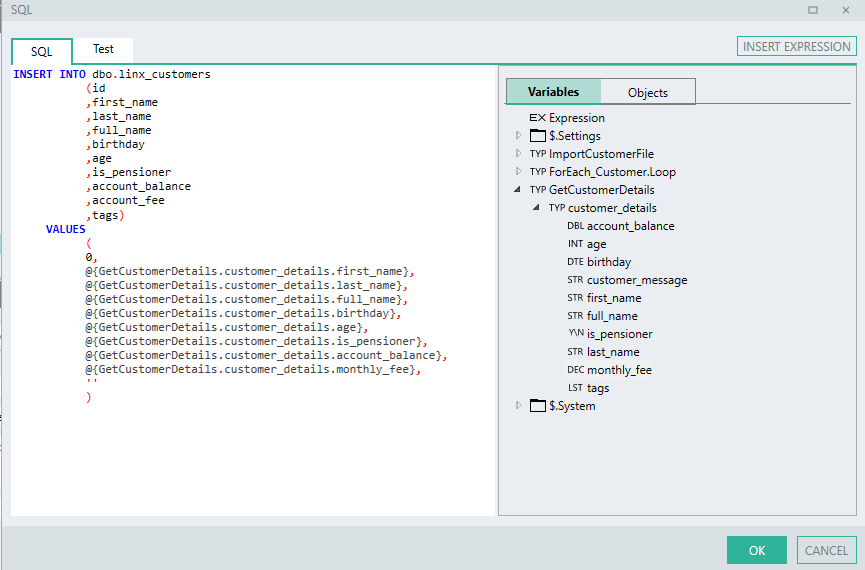
Take note, we will insert an empty space " " as the tags value for now.
Lets test it out.
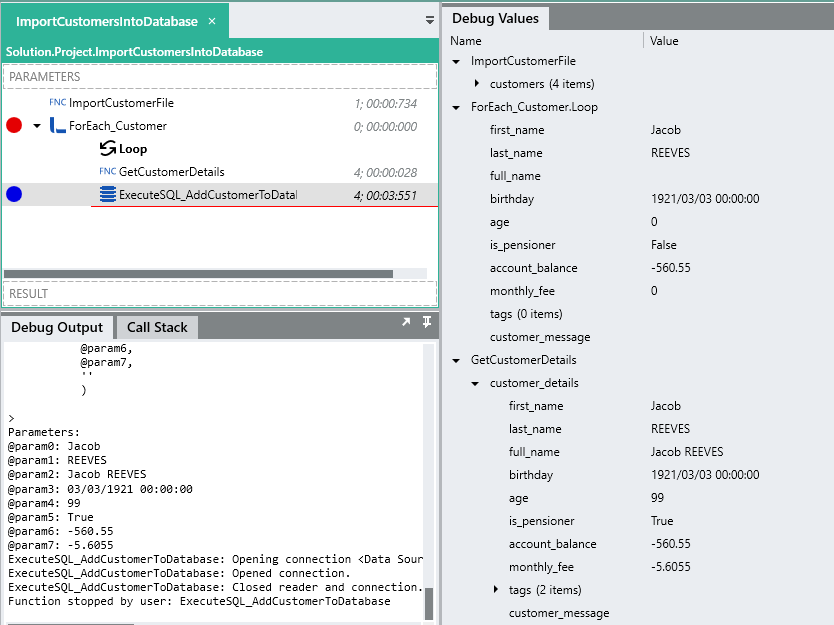
Place the “linx_customers.xsv” file back in the "C:\temp" directory. Then, debug the ‘ImportCustomersIntoDatabase’ function, The customers are enriched and then added record by record to the database.
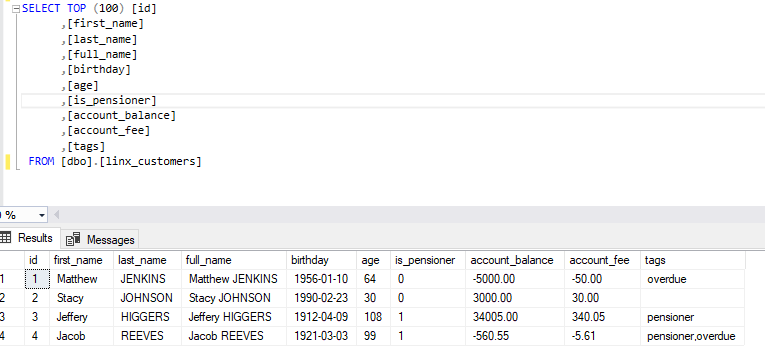
The records are now all in the database.
If you take a look at the records, there are some details missing as we excluded them from the insert statement:
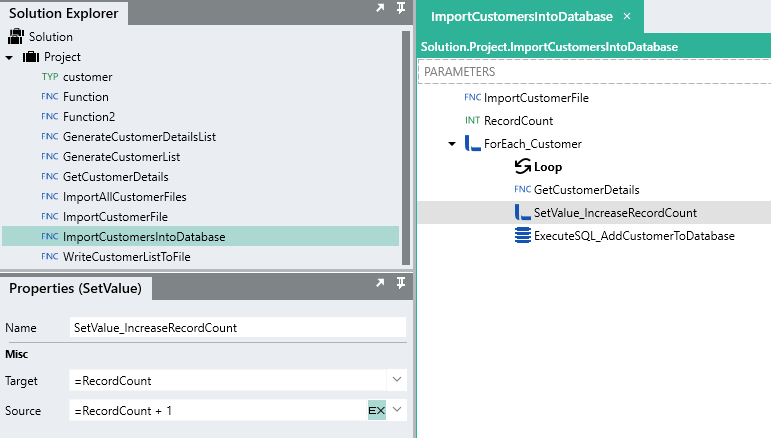
Just to give you some practice, we are going to create our own id value to insert by using an integer type called ‘RecordCount’ to count the records.
We will then insert this value as the id field in our SQL statement.
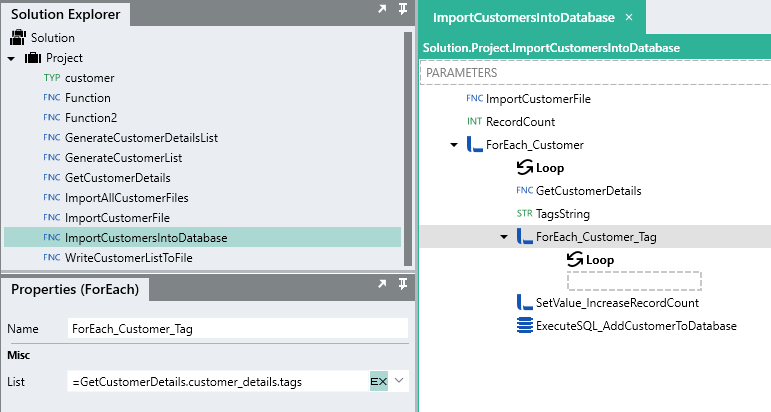
Now we need to add the ‘tags’ value to the database. If you remember from the previous tutorials, the customer.tags field is a list of strings and therefore needs to be iterated through. Because we are inserting a single text value into the database for the ‘tags’ field, we need to build up a string type like we did for the ‘CustomerMessage’ we built up in the earlier tutorial.
We can then reference this ‘TagsString’ in the SQL statement.
If you remember from the previous tutorials, the string that is built up will contain a trailing “,”:
![]()
Just like any data reference in Linx, you are able to use expressions on Linx variables within the SQL editor by selecting the value you want to build and expression out. In our case we want to remove the trailing “,” from the ‘TagsString’ value.
First select the ‘TagsString’ reference inside the SQL statement.
Then click on the ![]() when it becomes available.
when it becomes available.
Now in our case we want to remove the last “,” , but in cases where no tags exist for a customer then this will throw an error.
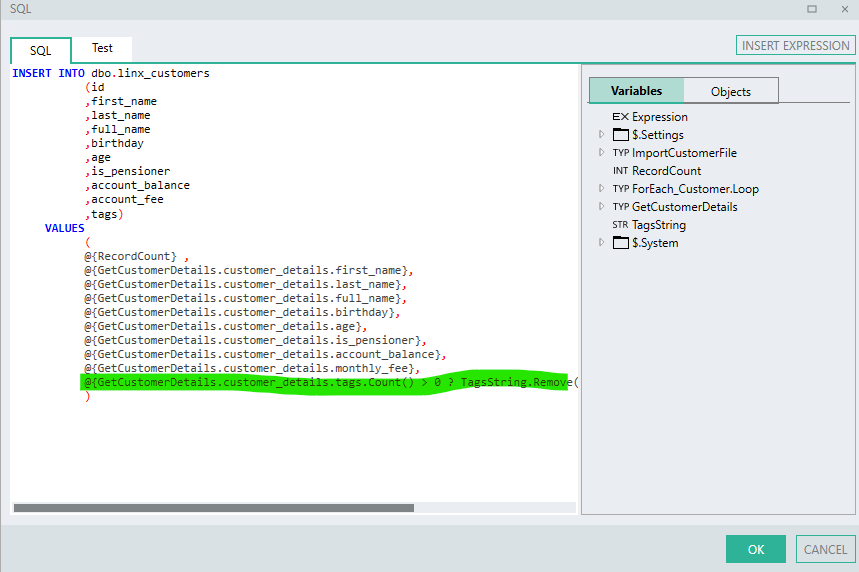
This where some cool decision making comes in with expressions. You are able to create conditional statements just like you would using an IfElse except you can do it when setting an expression straight in the properties. To demonstrate, we are going to check if the customer has any tags, if they do, then perform the text manipulation, else create an empty value.
When making conditional statements in Linx expressions, it works as follows:
{condition here} ? {value if true} : {value if false}
So for example:
= 1 > 0 ? "Positive" : "Negative"
This would evaluate if 1 is greater than 0, if it is true, then the text “Positive” would be the result, if not then the result of the expression will be the text “Negative”.
For our {condition} it will be:
GetCustomerDetails.customer_details.tags.Count() > 0
Then the ‘if true’ section is indicated with the chartacter ?
GetCustomerDetails.customer_details.tags.Count() > 0 ?
Then if it is indeed true, i.e. the customer has tags, then we can perform an expression to remove the last “,”.
GetCustomerDetails.customer_details.tags.Count() > 0 ? TagsString.Remove(TagsString.LastIndexOf(","))
Then the ‘else’ section is indicated with the character :
If the condition is not met then this value will be the result which in our case is " ":
GetCustomerDetails.customer_details.tags.Count() > 0 ? TagsString.Remove(TagsString.LastIndexOf(",")) : ""
The expression reference is now added to the SQL statement:
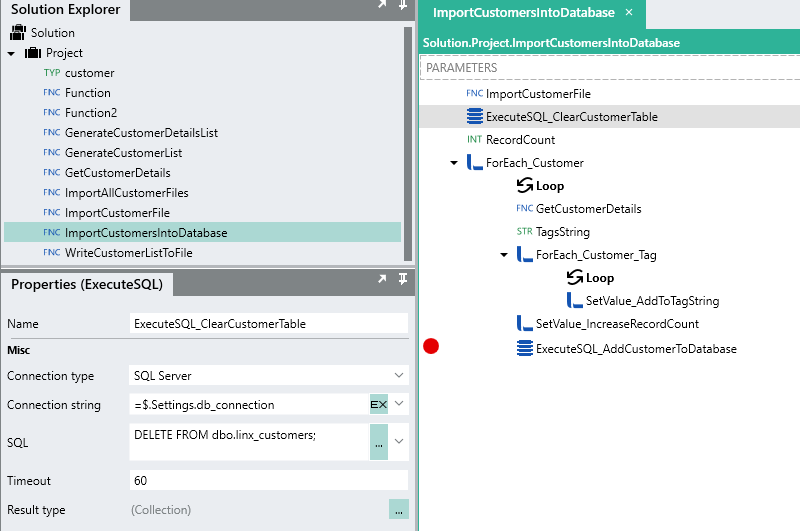
Now that we’re adding the full details correctly now, lets add a statement at the beginning of our query to remove all the current records in the table so only the current files records are stored.
We can do this be just adding another ExecuteSQL function to beginning of the ‘ImportCustomersIntoDatabase’ function and adding a DELETE statement.
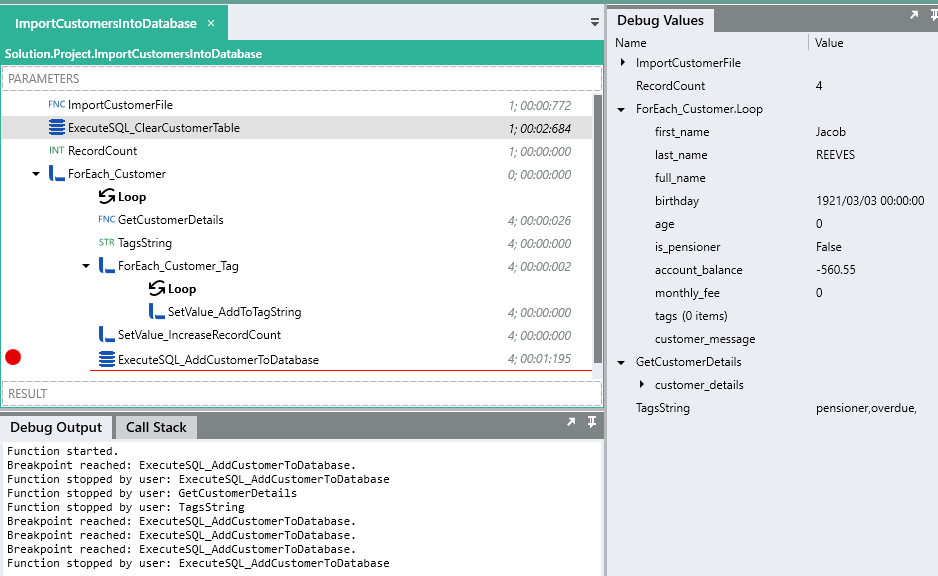
Debug the 'ImportCustomersIntoDatabase 'function , with the linx_customers.cv" back in the "C:\temp" directory:
Now the records are written with their full details:
Querying the database
Now that we’ve successfully insert records into our ‘customer’ table in the database, lets retrieve the records back out.
To do this we can use the ExecuteSQL function again but this time creating a SELECT statement.
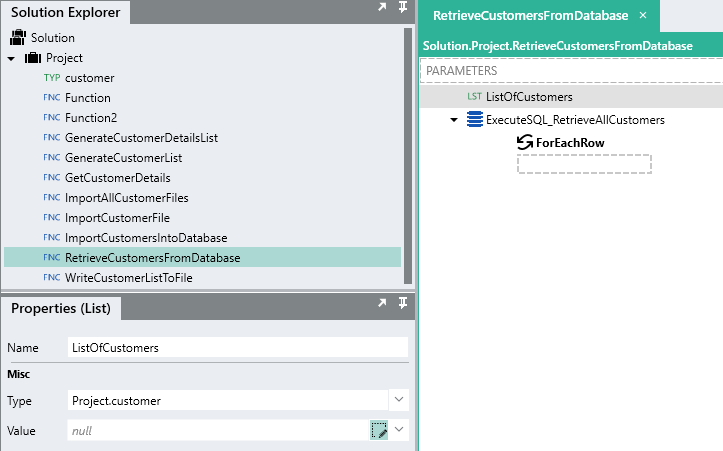
Lets create a new function which will allow us to query the database for all the customers.
Linx will automatically create a for each record execution path:
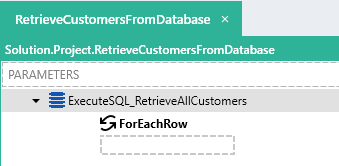
Linx will also automatically pick up the relevant fields from the query, these can be viewed in the result type property:
![]()
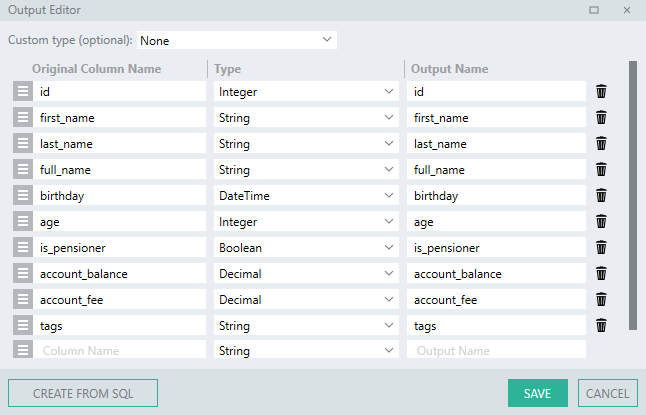
Lets now structure each record returned , back into a ‘customer’ type. Typically you could indicate to Linx that you want to output rows as a custom type by selecting the type at the top of the output editor, however, in our case, the field ‘tags’ from the database is a string of comma separate values and the customer.tags is a list of strings. Therefore we need to implement some custom logic to add each separated value as a item in the customer.tags.
First, lets create a global list of the ‘customer’ item type.
Using an AddToList, add the current row’s output values to the ‘ListOfCustomers’:
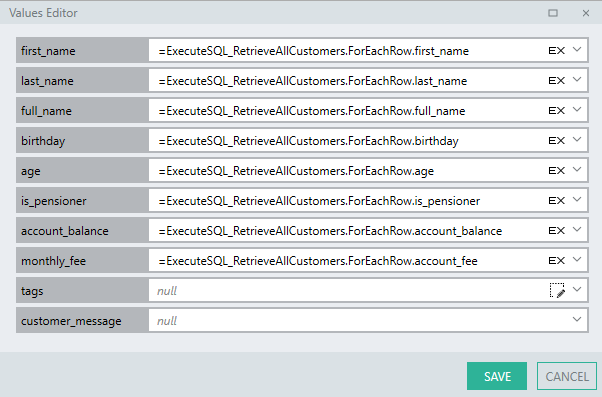
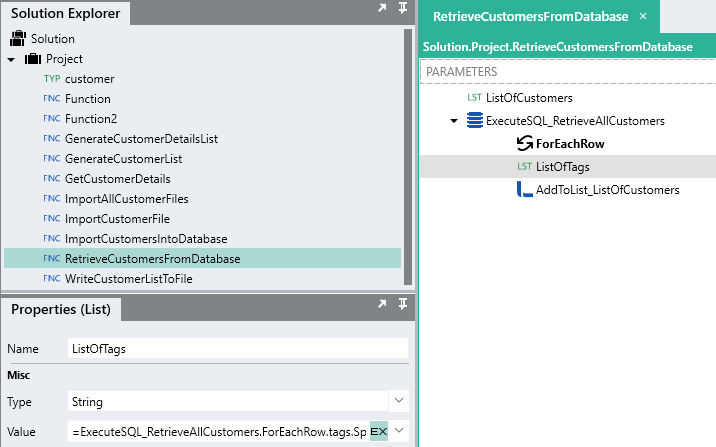
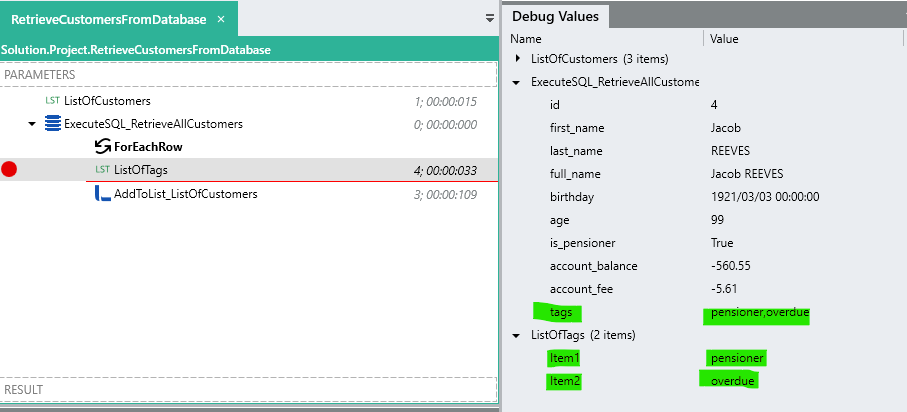
For the ‘tags’ list, we are going to split the value returned from the database into a list of strings which can then be assigned to the customer.tags.
To do this, add a new list of the type string.
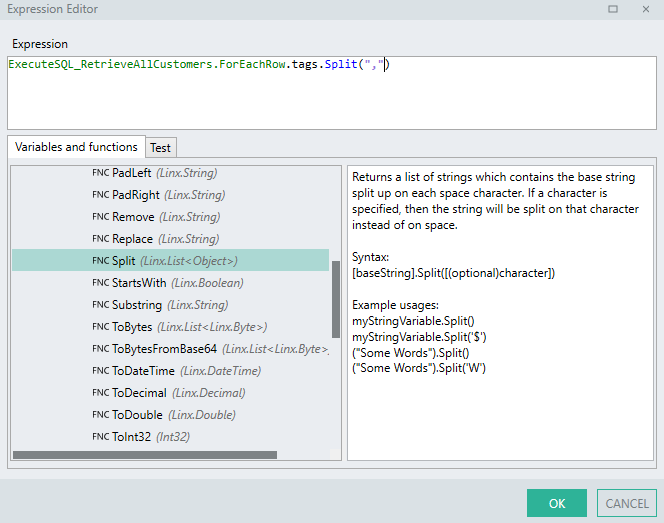
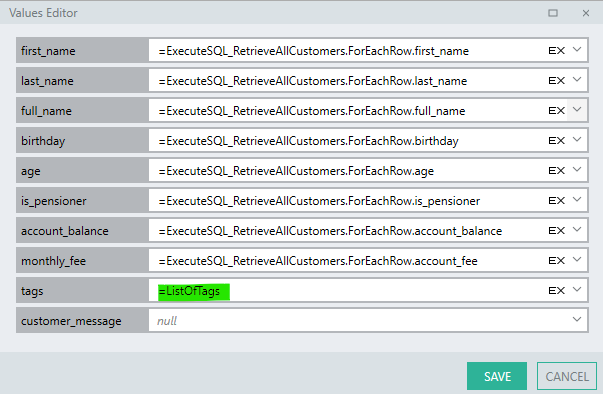
For its value, you can use an expression to split the string into a list by splitting text into items by the “,” character.
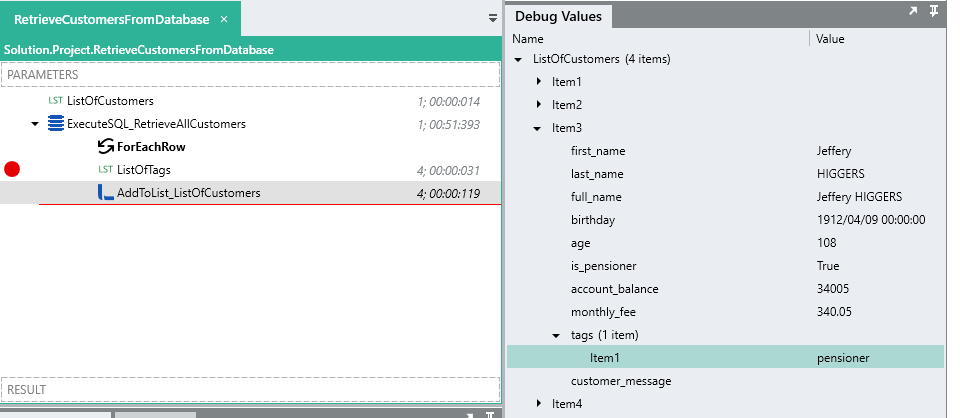
Now that we have our list of “tags”, we can assign it to the customer.tags value in our AddToList function.
When you run the ‘RetrieveCustomersFromDatabase’ function, the records will be retrieved from the database and then transformed into a list of ‘customer’ items.
Next steps?
We finished off this tutorial series by automating our application in the next tutorial.
