Overview
With Linx, you develop back-end applications which are hosted on a server. As a Linx application is server side, it needs to “listen” or monitor for trigger events which execute some logic.
Automating your Linx application involves the use of services ![]() .
.
Services are a primary component of a Linx application which allow you to automatically execute custom logic based on a event occurring. This means that once your application is deployed to the Linx application cloud server, you wont have to interact with it as it will run in the background.
In the Linx Designer, you are able to debug individual services as if they were deployed to a server, this lets you debug service functionality in real time to test it out.
Resources
Open the provided sample application in your Linx Designer to help along your learning journey: Solution.lsoz (39.8 KB)
Adding a timer service
Firstly, lets explore the TimerSVC . Whenever you need to perform repetitive tasks at set intervals or schedules, you can link your logic to a timer service.
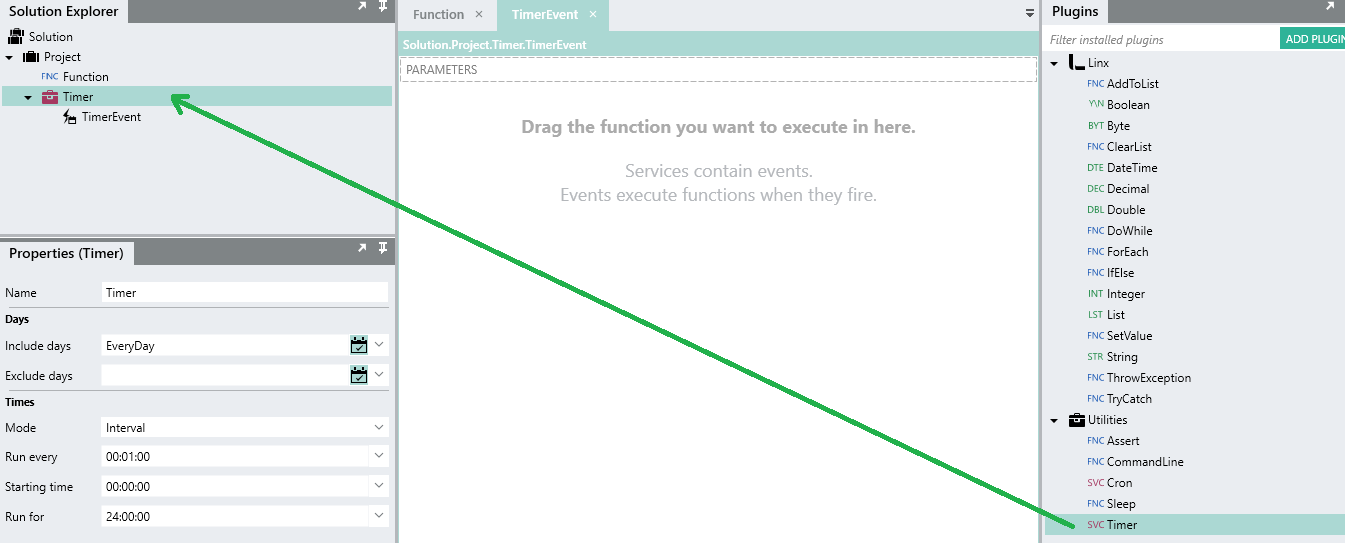
When you need to add a service to your application, drag it from the plugins panel into the solution explorer:
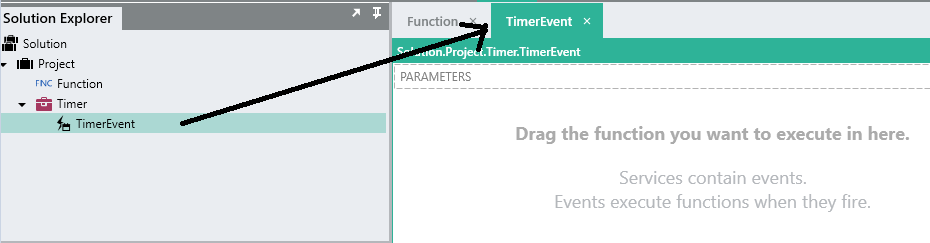
This will create an a service event, in this case TimerEvent, which exposes a canvas like a user defined function:
Any functions or logic added to this canvas will execute for each event that is “fired”.
To demonstrate, add a string type to the TimerEvent.
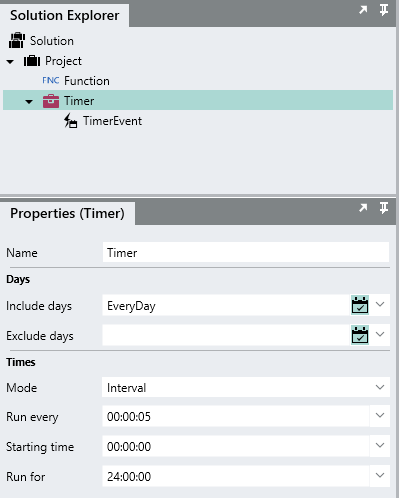
Next, configure the timer service to execute every 5 seconds:
Debugging the timer service
Now, like we have been debugging functions, we are also able to debug service which allows us to debug in real-time.
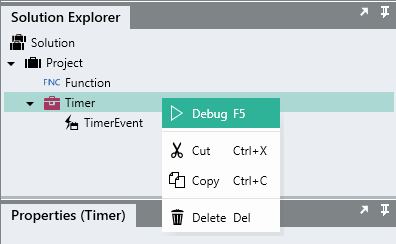
To demonstrate, right click on the Timer in the solution explorer and click debug:
When the debugger starts, you will see an indication of the timer event being fired in the debug output panel:

You will see as the events fire, the logic on our TimerEvent canvas executes. You can even add breakpoints and step through a live event.
Monitoring a directory
Often when creating applications which integrate with file systems, data is often dropped in a directory in the form of files. When this occurs, processing logic of some kind is performed. Using a DirectoryWatchSVC you are able to monitor directories for any file action occurrences i.e. file creation, file deletion etc. When one of these events occurs, logic will be executed. The DirectoryWatch service can be thought of as a timer service that constantly executes a FileList function to scan a directory.
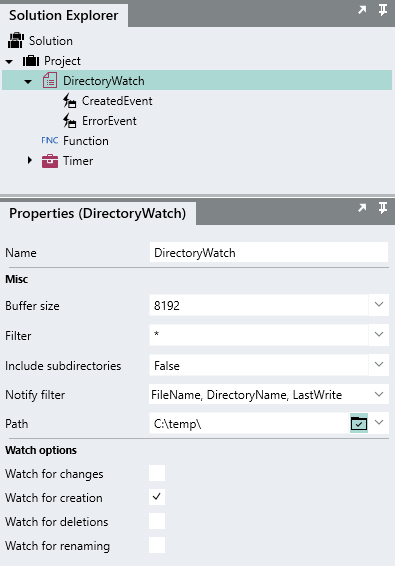
To demonstrate, add a DirectoryWatch service from the File plugin to your application like we did with the Timer service.

We can configure it to monitor the local directory C:\temp\ for now.
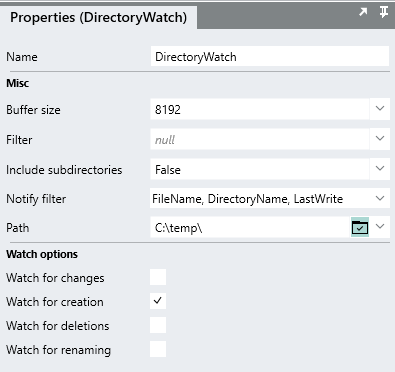
We will filter for all files which is indicated with the * character.
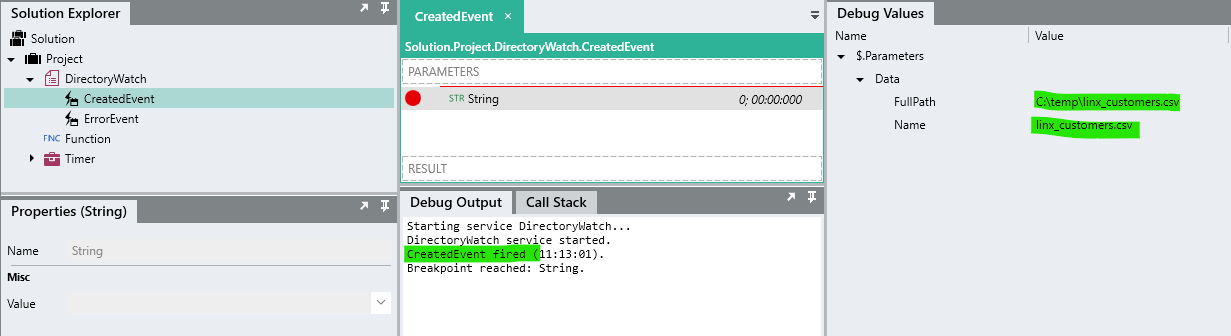
Next, debug the DirectoryWatch service, once started, copy a file into the "C:\temp" location. As you paste or create a file, the event will fire with the file details being passed into the event:
Automating our ‘customer’ import
So far in these tutorials, we have built an application that reads a text file containing ‘customer’ records, enriches these details and then inserts the records into a database. However, for us to execute this logic we have been manually debugging our functions. Lets automate our application so that when we drop a ‘customer’ file into a directory, the file import function will be kicked off with the records automatically inserted into the database.
Add a DirectoryWatch service to the application that we have been using in the previous tutorials.

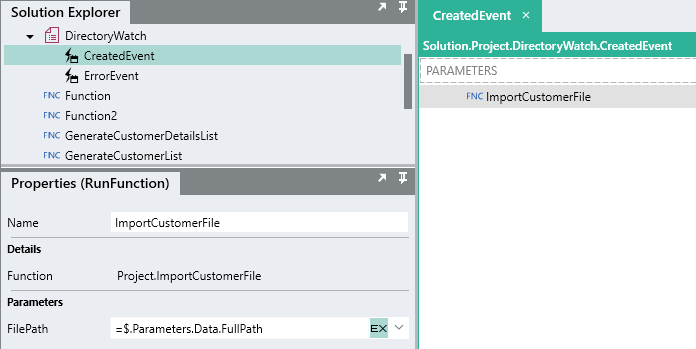
Next we are going to import the file that is picked up by using our ‘ImportCustomerFile’ function from earlier. We can reference the event’s FullPath parameter as the input ‘FilePath’ parameter for the ‘ImportCustomerFile’ function
Next we need to insert these records into the database. In the last tutorial we created the ‘ImportCustomersIntoDatabase’ function. However, it was built to only insert the records of a specific file. Lets alter it instead to take in a list of ‘customer’ items and then insert these instead of the records returned from ‘ImportCustomerFile’.
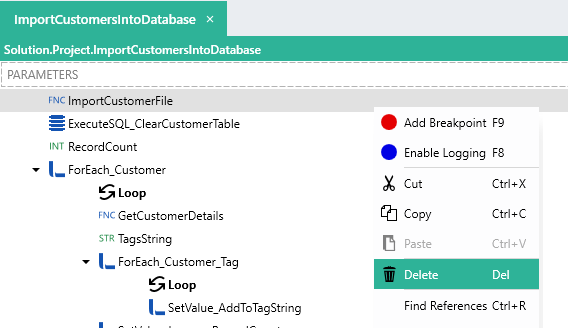
We can then delete the call to the ‘ImportCustomerFile’ function:
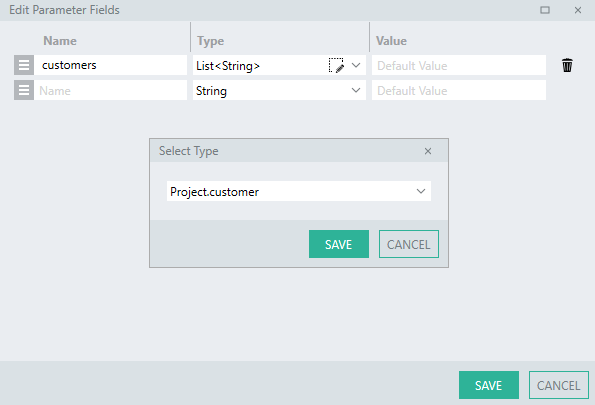
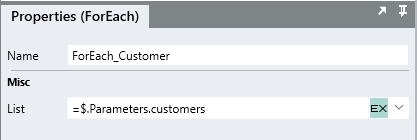
There will be an invalid reference error for the looping of customers:
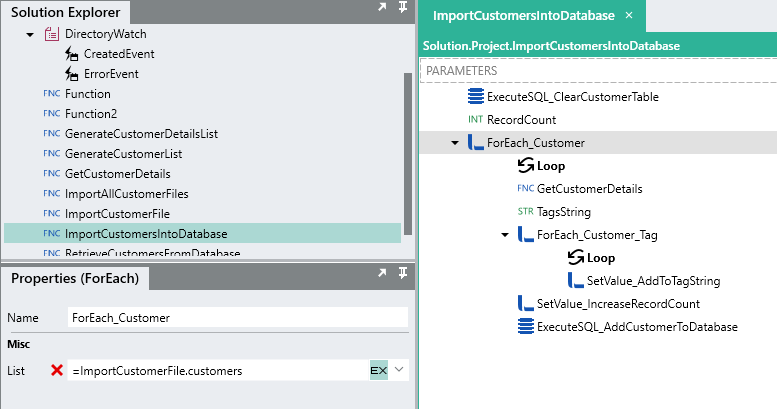
Alter this value to reference the incoming list of customers:
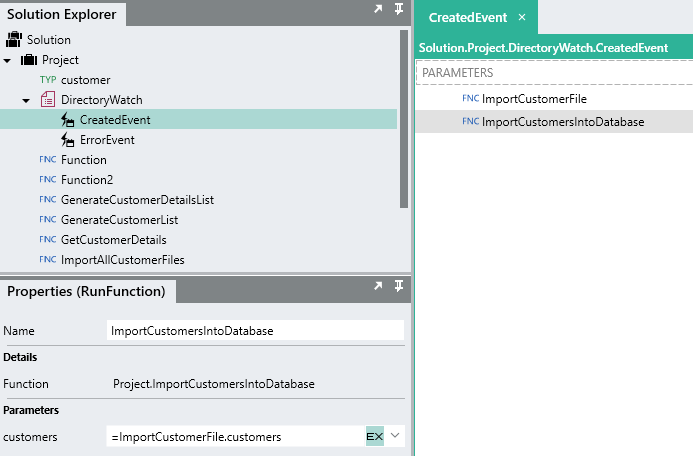
Now back to the DirectoryWatch created event, add a call to the ‘ImportCustomersIntoDatabase’ function, passing in the ‘customers’ returned from the ‘ImportCustomerFile’ function as the input parameters.
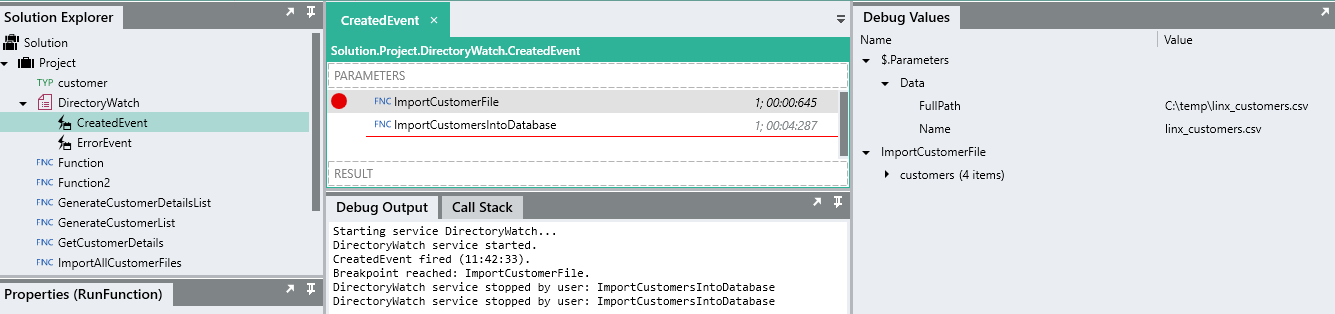
Now if you start service debugging on your DirectoryWatch, and drop the “linx_customers.csv” file into the "C:\temp" location, the file will be automatically picked up, moved to an archive location and the contents of the file enriched and inserted into the database.
Well done 
Congratulations! You’ve completed the crash course of Linx, hopefully now you’ll be more familiar with using the Linx platform to achieve your development goals. Take a look at other articles on our community for some more help and ideas.