Introduction
The SimpleRESTHostSVC allows for the creation of REST operations through a configuration “wizard”, this means that you do not need to create an Open API definition like with the RESTHostSVC .
The below describes how to create a “Hello World!” REST API using aSimpleRESTHostSVC .
The SimpleRESTHostSVC has limited functionality compared to the RESTHostSVC . Operations can only have a
200 (OK) response, if an error occurs then a 500 (Internal Server Error) will be returned. In order to return custom response codes then you must make use of the RESTHostSVC , more details can be found here. The below sample Solution has been provided to aid understanding.
SimpleRESTHost_HelloWorld.lsoz (5.4 KB)
Hello World
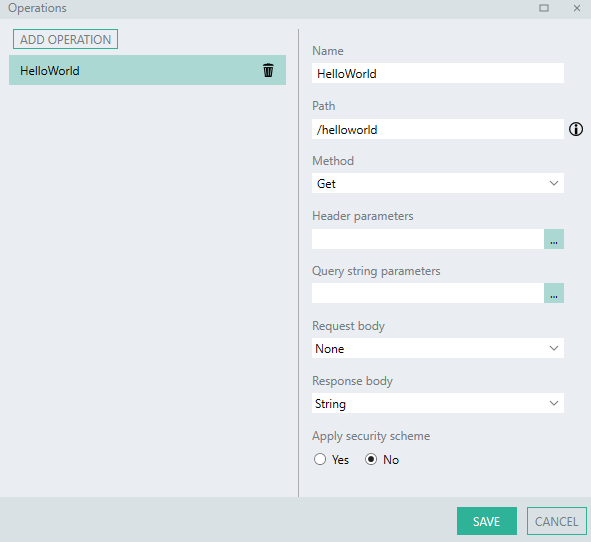
The web service will contain a single operation with the OperationID of HelloWorld which will be executed by a request to the path /helloworld.
The HelloWorld operation is configured to have a (200) OK response code and the response body will be a StringTYP .
The web service will be tested locally using service debugging.
Add a SimpleRESTHostSVC to the Solution
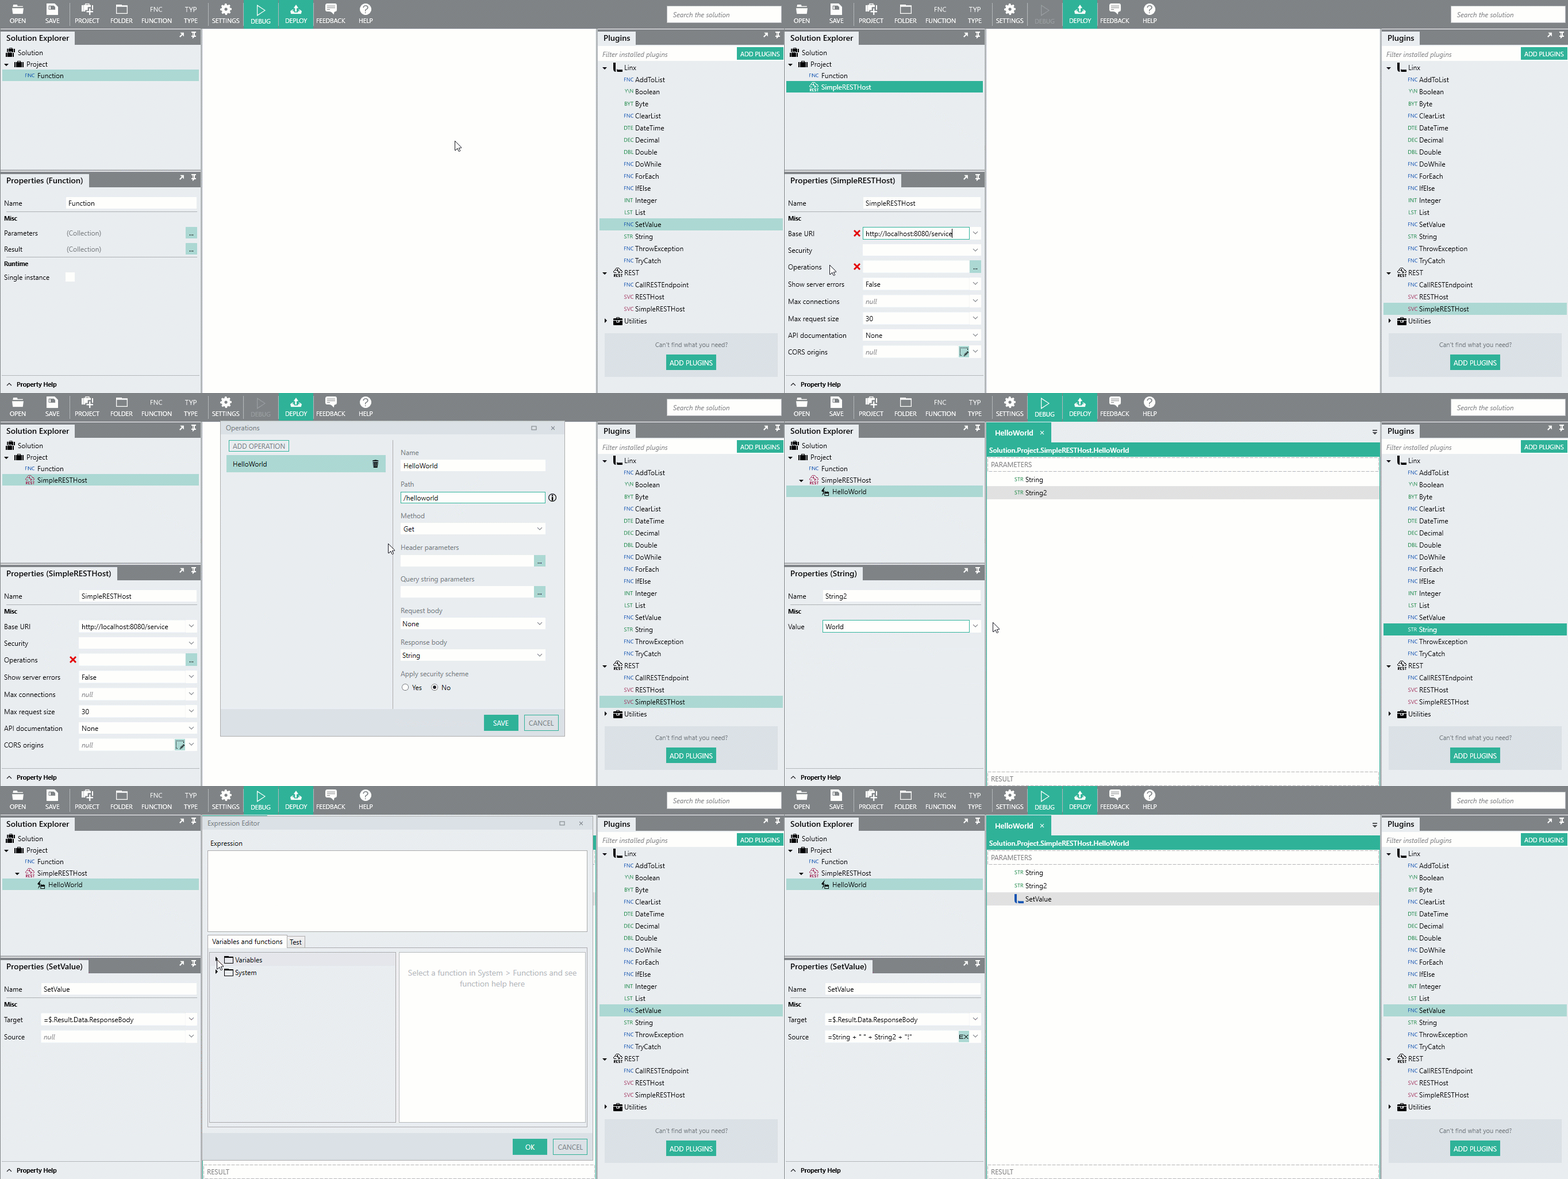
To add a SimpleRESTHostSVC to your Solution, drag the SimpleRESTHostSVC from the Plugins panel (from the RESTPLGsection), into the Solution Explorer.
This will create a instance of a REST web service for you to build with.
Next, configure the Properties of the SimpleRESTHostSVC like described in the following sections.
Add operations
To create your operation’s definition, expand the Operations editor of the SimpleRESTHostSVC .
You are then able to define the following using the editor:
- Name
- Path
- Method
- Header parameters
- Query string parameters
- Request body
- Response body
For the purpose of this tutorial we will be defining a single operation like below:
Add operation logic
To add logic to the operation, click on the HelloWorld operation in the Solution Explorer , this will select the operation in the Design Canvas.
-
Add a StringTYP to the beginning of the operation by dragging it from the Plugins Panel onto the Design Canvas - this creates an instance of a StringTYP with the default
NameofString. -
Alter the initial Value of
Stringto contain the text “Hello”. -
Next, add another StringTYP to the operation , with the default Name of
String1. -
Alter the Value of
String1to the text “World”. -
Add a SetValueFNC to the end of the operation, this is used to set the
response bodyof the operation. -
Reference
$.Result.Data.ResponseBodyas the Target of the SetValueFNCThe Source will be an expression which will combine both the StringTYP in the operation in the format of “Hello World!”.
-
In order to create such an expression, open up the expression editor (EX) in the Source of the SetValueFNC .
Add the following expression:
= String + " " + String1 + "!"This will combine the runtime values of the two StringTYP added earlier (
StringandString1).The result of this expression (“Hello World!”) will be returned in the
response bodywhen the operation completes.
Linx Designer view:

Debug service
In order to test the service out, you are able to debug the SimpleRESTHostSVC . This will create a local instance of the service within the Linx Designer which you can then test calls on with your browser or Postman. This allows you to both test the configuration of your web service as well as debug the logic within them with real time data.
-
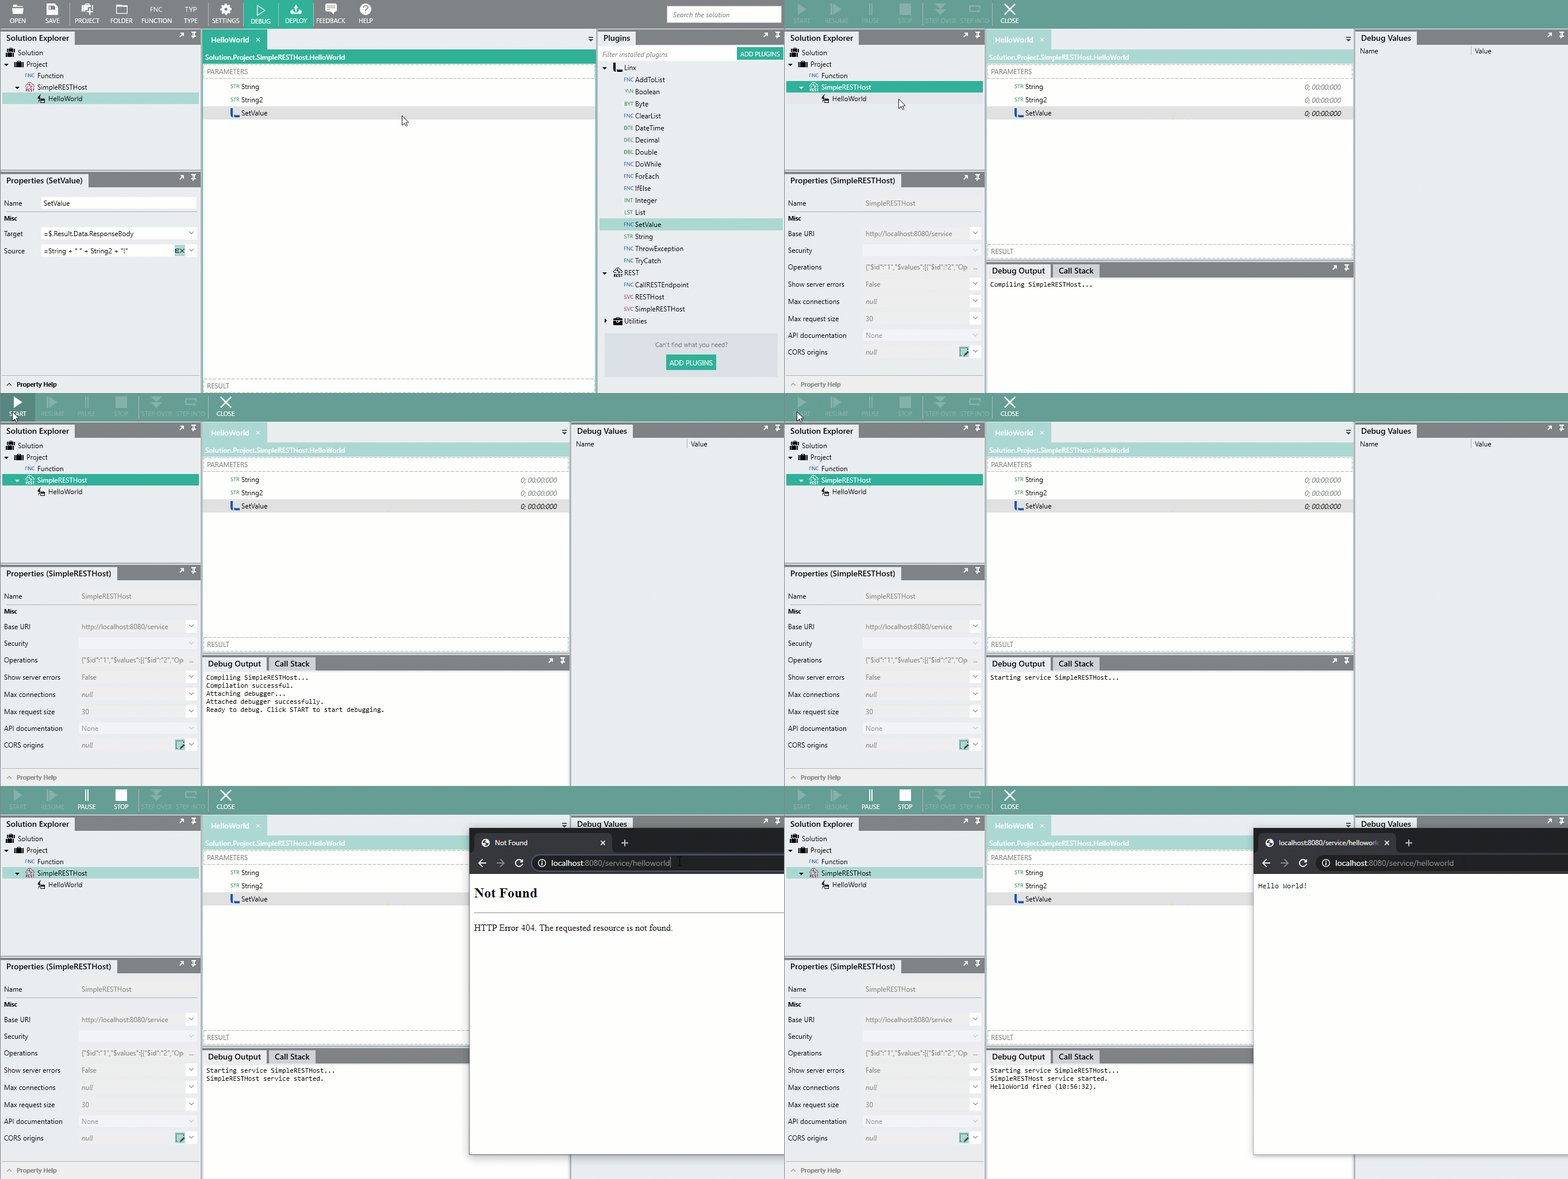
In order for service debugging to work on your local machine, configure the Base URI of the SimpleRESTHostSVC to:
http://localhost:8080/service -
Next, right-click on the SimpleRESTHostSVC in the Solution Explorer and click Debug.
This will initiate the local instance of the service.
In the Debug Output panel, the below message will appear:
Compiling SimpleRESTHost... Compilation successful. Attaching debugger... Attached debugger successfully. Ready to debug. Click START to start debugging. -
Next, click Start in the top menu bar.
In the Debug Output panel of the Designer, the below message will appear:
Starting service SimpleRESTHost...
SimpleRESTHost service started.
This indicates that the local service is active and test requests can be made.
-
To initiate the request flow, navigate to the below URL in a browser:
http://localhost:8080/service/helloworldIn the Debug Output , a log indicating the request event containing the operation’s name and time of execution should be displayed.
Starting service SimpleRESTHost...
SimpleRESTHost service started.
HelloWorld fired (12:33:27).
The request should succeed and a (200) OK response is returned with the response body content of “Hello World!” displayed in the browser window.
Hello World!
Linx Designer view:

Congratulations!
You’ve created your first web service with Linx.
